Showing posts with label Panzerkompanie. Show all posts

Wednesday, 18 September 2013

StuG Life...

A couple of weeks back, I posted over on my other blog, about my StuGs & StuHs...

Well, I just finished up painting up the replacement box I was so kindly sent by Will at PSC...

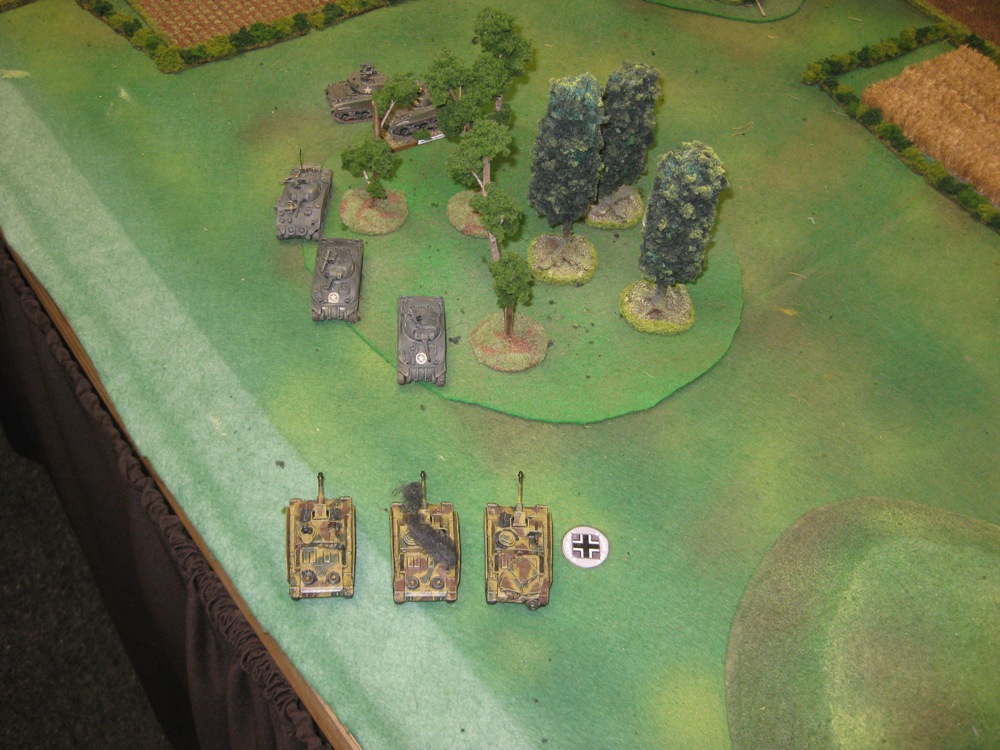
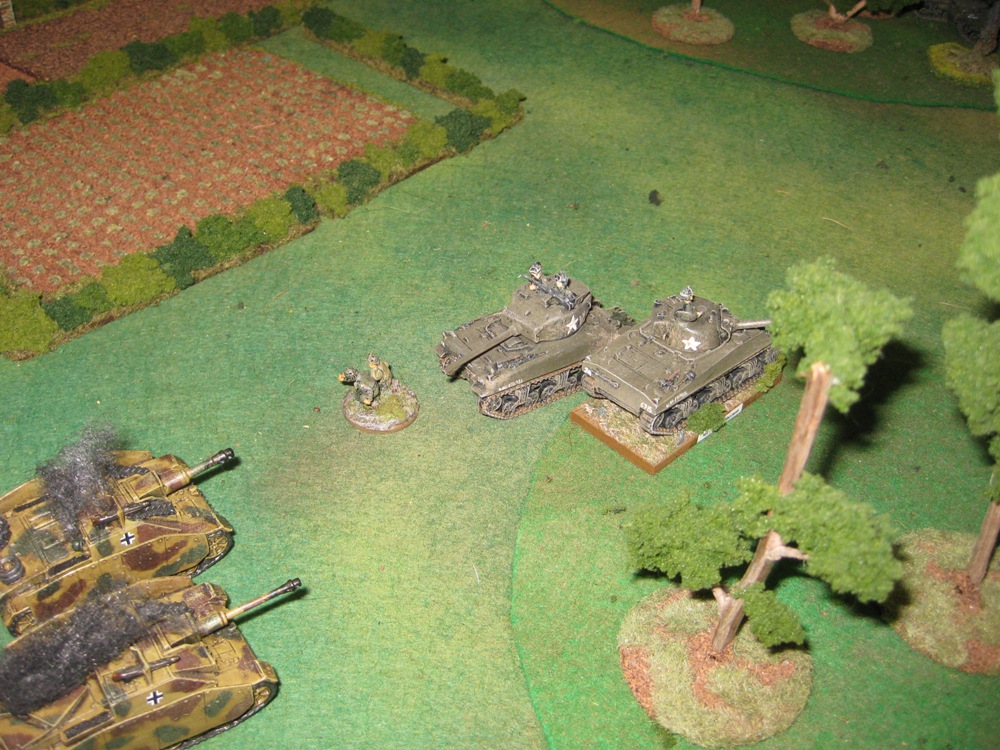
This time I decided to go with 2 more StuHs, making a total of 6 (for 2 platoons of 3 vehicles) and, for a little variety, decided to do 3 of the StuG III F/8. This StuG III has a subtly differing hull profile than the G model, but in game terms is identical. It also features in some of the MidWar lists, so I thought it worth having a platoon of this StuG variety for this role, and they can also proxy well enough as a G model, if I need to field more StuGs, in LateWar lists...

StuH 42

StuG III F/8

Command F/8 with rear decal, just to make it noticeable.

The F/8 model appears not to have been routinely fitted with the external hull MG, but the stats in the game still list it as having one, so I added it to the hull, even though the PSC kit instructions didn't include it on the F/8. A little googling found that the MG and shield, were retro fitted to the F/8 later in the war period, so that works for me...

So now with a grand total of an assortment of 15 StuG and StuH vehicles... I now need to see how best to field them...

I can recall from my earliest days of collecting my German troops, coming across the StuG. The first German troops I got were FestungKompanie Grenadiers, and looking at the lists of the time, these Normandy based Grenadiers were supported by Kampfgruppe Meyer and the 1352 StuG Battery... So the idea of fielding a whole company of StuGs has always been floating about in my head...

There are also some Eastern Front themed lists in Grey Wolf, offering both a StuG battery, and simply using the StuGs in a Panzerkompanie. The difference being in the StuG battery the platoons are fixed at 3 tanks, but I can also field one of them as a StuH. The StuG battery also includes the option of adding Begliet Tank riders/escorts. These extra troops make up for some of the StuGs shortcomings, giving the tanks extra MG fire, defensive fire, protection against the 'Sneak up on Tanks' rule and extra attacks in assault...


StuG Battery, featuring multiple platoons of 2 StuGs & 1 StuH, with three or four platoons, and a lead HQ tank...


I have received two packs of Begleit troops, so just have to paint them up and see how I can add them to the tanks, in a way they they can be 'optional', and not glued on all the time... I fear that's going to be rather tricky...

Another StuG Battery features in Bridge by Bridge in the defense of Arheim, so there's more options for Market Garden themed forces... (I always like to try and play to 'theme').

The Panzerkompanie, gives the option of fielding platoons of 3-5 tanks, but no StuH option. However fielding a Panzerkompanie also gives the chance of fielding a platoon of panzer IVs alongside the StuGs, and or Panthers... so there are many options to explore. And thats just the tanks, theres all the support platoons to consider too...

StuG PanzerKompanie; 2 x HQ StuG, plus 2 x 4 StuGs

Either way, I think Recce will be a must, to push back ambushes and lift GoneToGround on hiding enemy troops. Cheap motorcycle scouts at ~100pts give me the chance to improve my chances to hit by 17% by lifting GTG, so well worth it I think, and essential in at least in part, mitigating enemy ambushes...

After that, what else?

Whenever you field medium tanks, there are always cries of 'but how will you deal with Heavy Tanks'?
Well, there seem to be several options;
Add your own heavies - Tigers perhaps, if you haven't already taken Panthers.
Add cheap Tank Hunters - Marders, Hornisse, Nashorns perhaps, or static Flak '88's?
Smoke them with artillery, simple Mortars, Nebs or 105 howitzers?
Kill them with Heavy Artillery - 150s or Hummels?
Or just keep maneuvering and going for flank shots?
Or just ignore them and kill everything else?

So, many options there to explore...

Do I bother about AAA? My regular playing partners rarely use aircraft, especially in LateWar, so spending points on these platoons often seems a bit of a waste of time for me, but they may be a cheap way to add an extra platoon, if I am trying to even up the number of platoons in the force. Normally, Tank companies are going to be attacking, but there are always chances you will end up defending, with reserves, and only having half your force on the board, so that needs to be borne in mind...

Do I go with the all mobile, all tank attacking force as many panzer players seems to advocate, or do I go with a more balanced approach, including artillery and/or infantry support of some form? I guess it depends on playing style and how I expect to play them...

Time will no doubt tell, as I try things out and experiment, seeing what works and what doesn't...

Another Force I am considering is the FuhrerBegleit Brigade list, currently a Pdf format list from BF website. What it allows me to do is make a Mechanised force featuring my gepanzerte halftracks, backed up by two platoons of 3 StuHs. This force can also have the German warrior character; Remer, added to it, who I found a wonderful asset in the MidWar theatre to accompany my GPGs..., so no doubt he'll shine leading my GPGs once again... (and they have his rules properly spelled out, now so no grey areas...)

2 platoons of StuHs for the FuhrerBegleit Brigade force

The final decision with that force will be how best to round it out, HQ+ Remer, plus 2 full GPG, plus 2 x 3 StuH, + ??? Perhaps some artillery might do the trick - I have a Heavy Artillery platoon just arrived, and its next on the painting list after the Begleits are finished.... At first I thought no Recce was available with this force until I notice the option of adding a panzergrenadier platoon, mounted in schwimmwagon jeeps, which are recce... Of course, with taking two platoons of StuHs, we're back to the question of dealing with heavy, and even medium tanks for that matter, as the StuH is only AT10... perhaps some 88s? Or rely on a Heavy Artillery bombardment...? Of course, with Remer at the helm and all my infantry teams armed with PanzerFausts, I could just assault enemy tanks! Talk about ballsy!

So there's a whole host of ways of fielding my StuGs and StuHs... I look forward to trying out some of these variations and will no doubt keep you informed of their battlefield progress.

Here's a final shot of all the Tanks...


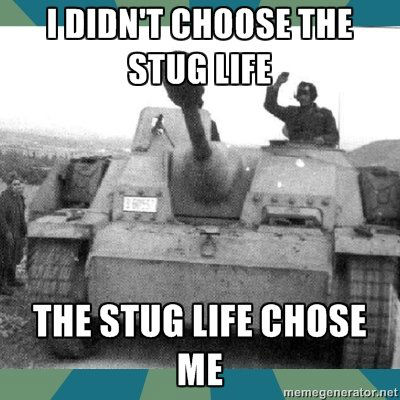
And a little StuG humour - an oldie but goodie... thanks to Pedro...

Something I can definitely identify with on the odd days I get caught in traffic!

Which reminds of that classic Kenny Everett sketch... enjoy!


Yeah I know, its not a Sherman, but I don't think Kenny was too concerned ;-)

StuG Life...nuff said!
 

Some rough ideas follow from the various theatres of war, though they may need some tweaks to get them down to that specific 1750 points limit...

Sorry the tables vary in size, its not straight forward porting across from EasyArmy...

LISTS:


  Confident    Veteran  Panzerkompanie
Tank Company
German Late-War
Tank Company
PlatoonQtyUnitPoints
Headquarters
Panzerkompanie HQ p.73
2StuG G or StuG IV190
Combat Platoons
Panzer Platoon p.73
4StuG G380
Panzer Platoon p.73
4StuG G380
Panzer Platoon p.73
5Panzer IV H450
Divisional Support
Tracked Panzerspäh Platoon p.92
3Panzer II L Luchs145
Motorised Artillery Battery p.167
1
1
4
2
2
Cmd SMG team
Staff team
10.5cm leFH18 howitzer
Observer Rifle team
Kubelwagen
210
Company Points:1755
www.EasyArmy.comSource document: Grey Wolf


  Confident    Veteran  StuG Abteilung (352.)
Assault Gun Detachment
German Late-War
Tank Company
PlatoonQtyUnitPoints
Headquarters
StuG Abteilung HQ (352.) p.39
1StuG G95
Combat Platoons
StuG Platoon (352.) p.39
3StuG G285
StuG Platoon (352.) p.39
3StuG G285
StuG Platoon (352.) p.39
3StuG G285
Weapons Platoons
Füsilier Anti-aircraft Gun Platoon (352.) p.41
1
2
Cmd SMG team
3.7cm Flak43 gun
70
Support Platoons
352. Füsilier Platoon p.34
1
6
Cmd MG team
MG team
180
352. Füsilier Platoon p.34
1
4
Cmd MG team
MG team
130
352. Festungs Heavy Artillery Battery p.42
1
1
2
4
Cmd SMG team
Staff team
Observer Rifle team
15cm sFH18 howitzer
310
Luftwaffe Anti-aircraft Assault Platoon Reluctant  Trained Allied Platoon  p.229
1
2
Cmd SMG team
Luftwaffe 8.8cm FlaK36 gun (8 crew)
115
Company Points:1755
www.EasyArmy.comSource document: Atlantik Wall book


  Confident    Veteran  StuG Batterie
Assault Gun Battery
German Late-War
Tank Company
PlatoonQtyUnitPoints
Headquarters
StuG Batterie p.121
1StuG G95
Combat Platoons
Assault Gun Platoon p.121
3StuG G285
Assault Howitzer Platoon p.121
3StuH42 285
Assault Gun Platoon p.121
3StuG G285
Support Platoons
Pionier Platoon (85.) p.45
1
9
1
Cmd Pioneer Panzerfaust SMG team
Pioneer Rifle team
Goliath Demolition Carrier
275
SS-Scout Platoon Fearless  Veteran Allied Platoon  p.115
1
3
Cmd MG team
MG team
155
Motorised Heavy SS-Artillery Battery Fearless  Veteran Allied Platoon  p.139
1
1
1
1
3
3
1
1
Cmd SMG team
Kfz 15 field car
Staff team
Kfz 68 radio truck
15cm sFH18 howitzer
Sd Kfz 7
Observer Rifle team
Kubelwagen
270
Air Support p.140
3Sporadic Air Support FW 190F100
Company Points:1750
www.EasyArmy.comSource document: Bridge by Bridge

  Confident    Veteran  StuG Batterie
Assault Gun Battery
German Late-War
Tank Company
PlatoonQtyUnitPoints
Headquarters
StuG Batterie HQ p.59
1
1
StuG G
Assault Rifle Tank Escort
110
Combat Platoons
StuG Platoon p.59
2
1
3
StuG G
StuH42
Assault Rifle Tank Escort
330
StuG Platoon p.59
2
1
3
StuG G
StuH42
Assault Rifle Tank Escort
330
StuG Platoon p.59
2
1
3
StuG G
StuH42
Assault Rifle Tank Escort
330
Weapons Platoons
Pionier Platoon p.61
1
9
Cmd Pioneer Rifle team
Pioneer Rifle team
235
Divisional Support
Sturm Scout Platoon p.57
1
2
Cmd Motorcycle MG team
Motorcycle MG team
110
Heavy Artillery Battery p.166
1
1
2
4
Cmd SMG team
Staff team
Observer Rifle team
15cm sFH18 howitzer
310
Company Points:1755

Source document: Grey Wolf


Thursday, 2 May 2013

Firestorm Lorraine - Turn one, Game two - Hold the Line

A couple of weeks back, Brett and I decided to make more of our series of one off games, now that we both have a degree of competence with the rules and general tactics of the game, so some kind of campaign of linked games seemed in order.

 Some time ago Brett picked up the Blood, Guts and Glory book, for his American Forces, and was quite thrilled with the prospect of Tank battles in NW Europe.

I must confess at the time this came out, and I checked out the German lists, suddenly finding my Wehrmacht was getting reduced to Reluctant Trained as the Yanks improved to Confident Vets, did not fill me with much enthusiasm...

However, having found a free online download of a smaller scale Firestorm setting entitled Lorraine from the BF website, it seemed too good to pass up the chance to learn the Firestorm campaign setting. We also have the Firestorm Market Garden and Bagration sets but haven't figured out how to use them yet, so this seemed the perfect way to learn...

The first game we played saw, Brett start the campaign, attacking my forces in Luxemburg (A3) from Mairy (B3). I chose a themed Panzerkompanie from BGG, which Brett had to attack with his Armoured Rifles, and we rolled up Counter-Attack. Brett had a bunch of big AT guns as his Firestorm troops for the mission which he put down on a ridge overlooking my position, which kept me pinned down behind it. We cocked up a bit giving the guns the benefit of being in cover for being dug in, not realizing they were too big to get this cover bonus... I managed to keep my force fairly intact, knocking out a couple of these guns with moving and storm troopering back out of harms way... but Brett advance across a broad front, and manage to get his 'teleporting' M10 tank destroyers behind me by about turn 4 or 5 and in one round of coordinated activity wrecked my force which being reluctant failed a bunch of morale rolls and quit the field giving Brett a 6-1 win and Luxemburg!

Thankfully Brett failed his campaign roll to destroy my Firestorm tanks (3 x PzIV/70s). We then rolled of for initiative for the next battle, which I won making me the attacker in the next game.

So on with game two of Turn One...

As the German player I am only allowed to attack from a location that has Firestorm Panzer troops. This limits my options some what, but allowed me the chance to counter attack round Luxemburg, rather than going for it directly, with the chance of cutting it off, so that's what I chose to do...attacking from A4 to B3 Mairy

I stuck with the same Panzerkompanie from BGG, which in the first Turn sequence of the game gives you 1250pts.

I took:
HQ - 2 x Panther G
3 x Panther G
4 x PzIV J
3 x StuG G
1 x GPG 'scout platoon'; 7 x P'faust/MG teams and 5 x 251/1D half tracks

Added to this force I had the Firestorm Panzers; 3 x PzIV/70's (proxied in game by jagdpanzers).

Brett took (IIRC):
HQ - 2 x Sherman 76's
2 x Shermans + 2 x Sherman 76's
3 x Shermans + 1 x Sherman 105
Tank Destroyer 'teleporters'; Security section plus 2 x M10's

Added to his force he had a Firestorm Infantry Platoon of 10 teams plus 1 x bazooka


 I set the terrain up before the game, representing (hopefully) the French countryside of the Lorraine area...

And we rolled up a mission; Hold the Line.

As soon as this happened, I felt doomed - I have played this recently against Paul in our Breville campaign and know only too well, whilst the defender suffers delayed reserves, he benefits from 2 ambushes. So Bretts 4 platoon tank force would mean, 2 platoons off and 2 platoons on, both ambushing! Sure enough that's what Brett did, having chosen the end to defend, and us placing objectives.

Brett predictably placed one objective centre rear of his position and I placed mine as near as possible in the open to my right hoping my tanks could get a quick clear run at it.

So the only troops on the table for Brett were his HQ tanks, one each tucked behind the left and right flank woods in below pic.

I had opted for a rush down the road with my half tracks, knowing full well they would get hammered, but this would sacrificially reveal Bretts ambush, hopefully allowing my following tanks something to do about it. I thought about AtTheDoubling the half tracks straight onto the objective, but it would only have made their demises all the more easy and even if they survived they wouldnt be able to contest the objective for a further turn.

The half tracks would be supported by the majority of the tank force.
I did however decide to send the StuGs on a long run round the left flank, thus threatening the rear of Bretts CO tank, and a threat on the rear objective. I also chose in the end to ATD them (this would be a tempting target to attract Bretts other ambush, and be as far from the front objective as possible...)

So, my deployment as below, Bretts tanks virtually hidden from view behind the woods...


...and view again from the other end...


Then I remembered to deploy my HQ Panthers behind the main central thrust following the half tracks...

The FHH Panzerkompanie, is horribly one dimensional - all armour - no real recce to mitigate ambushes. The GPGs are 'scouts' in name only... Nor do I get any artillery which could offer me the concealment of smoke,... its just lots of guns, that are easy to hit, and once hit and taking damage will quickly quit the field due to their poor morale rating. The only thing to keep me in it, is the high front armour of the Panthers and PzIV/70s...


So off we went 'to the races', with the GPG roaring off down the road, singing 'Gott mit uns' as he was going to have to be! The panzers followed up behind, trying to get positions to fire back at the likely place Brett would pop his ambush...


... with the StuGs heading off down the other flank, trying to draw more attention... I have no targets in the first turn, and stormtrooper at little closer with half tracks and PzIVs...


Bretts tankers cant believe their luck, seeing a trio of StuGs advancing having thrown caution to the wind... Brett lines up 3 tanks with 12 shots at the ATDing StuGs..., with the 105 looking at the half tracks the other way...


In the centre wood, 4 more Shermans train their barrels on the 'do or die' armoured infantry... and can also see the leading PzIVs coming round the farm house...


The Shermans let rip destroying all five half tracks, but 4 of the 7 teams inside survive, leaping from the flaming wrecks ... luckily meaning they are not required to take a platoon moral check...


Two of the PzIVs are also hit multiple times, but are only bailed, but sadly taking multiple bail results each, are forced to take morale checks and being reluctant promptly quit the field leaving yellow 'coward' markers to show their last known positions... However the remaining tanks do not require a morale check, the platoon being at 50% strength...


The StuGs receive the incoming 12 shots hitting on 3s, yet amazingly only suffer one destroyed and one bailed! Which doesn't amount to a morale check...


I have survived the ambush, and amazingly have a chance to continue! Really I should have been blown away in turn one, game over with three platoons out of 5 gone and a pathetic chance of needing a 5 to stay on the table... But sometimes thems the breaks, so press on ...

German turn 2, the bailed StuG remounts! And the two press on to threaten the rear of the COs Sherman...


The five Panthers look for payback against the central Sherman platoon; 10 shots needing 6's, can I get lucky?...


While the remaining 2 PzIVz's and '70's go after the Sherman 2iC...


The Panthers score 3 hits, destroying 2 Shermans and bailing a third... the platoon promptly rolls a 1 for platoon morale and quits the field, evidenced by the fleeing tank crew down the road...


The StuGs score two hits on the Sherman CO, who promptly decides to join the adjacent Sherman platoon and allocates hits there, which destroy 2 Shermans...


But the Sherman 2iC survives, all shots missing, curses! But still, that's really made it game on for the Germans!


Now Brett has some work to do! The 2iC returns fire at the remaining PzIVs destroying one and bailing the second, who fails morale and quits the field...


On the flank, Brett manages to get a Sherman out of the woods and onto the flank of the StuGs and the CO joins in the shooting... Darn stabilizers on the moving Sherman still gives him 2 shots, added to the 2 from the CO spell the end of the StuGs. Still they achieved more than I expected... and tied up a platoon on the wrong side of the board for a couple of turns...


Back to the Germans, the Panthers move up through the cornfield to try and take out the Sherman CO... The German infantry have still failed to motivate but dig in and stay gone to ground...


The 70's get into position to kill the Sherman 2iC tank...


This time up he goes in flames, and we're sitting on the objective, with nothing in range to get anywhere near to contest. The 70s fail their stormtrooper move so are left with their arse's literally hanging out, but I cant do much about that and there's little that can affect them...


The Sherman CO is only bailed... who scampers from his tank...


Bretts turn three and he rolls one dice for reserves needing a 5 and wouldn't he darn well get some! Up come the 2 M10s from the tank destroyer platoon. No stabilizers, gives them 2 shots at range and cover for slope of the hill at the rear of the 70's, needing 5's... Brett rolls 'box cars' followed by two successful FP tests and 2 of the 70's brew up! I need a 5 for platoon morale to stay in it, and get a 5!


The Shermans who had moved over from the other flank cant hurt the front armour of the panthers and miss the remaining 70.

In the Germans return turn, the Panthers in the cornfield knock out the 105 Sherman, and the 70 moves to the cover of the burning wrecked 70's, which also gets him contesting the objective, and aims at the M10s, as do the 2 HQ panthers.


The cornfield panthers destroy the Sherman 105...


Whilst one of the M10s is knocked out...


Bretts turn 4 sees his last reserve arrive, in the nick of time? The infantry Truscott trot desperately toward the German front objective but are still too far from it...


Brett has to break me this turn with his shooting or its all over... the M10 returns fire at the 70 but fails to destroy it, one shot hitting but bouncing off its front armour...


Brett moves the remaining Shermans from the flank to have a shot at the flank of the panthers. I had been unable to pass stormtrooper with them last turn to avoid such a possibility, but thankfully only bail one of the panthers in the cornfield!


And that is it, Brett has failed to break my force, and I start the next turn sitting on the front objective, claiming a 4-3 win! Who'd have thought it!? Games of dice eh?!


So that means I capture Mairy, and am one sector away from cutting off Luxemburg.

We both rolled to see if we destroyed the others Firestorm troops, needing 6s and both failed so our forces are still intact.

We also rolled to see who would get initiative for the next battle, with Brett winning the dice roll, so he will attack somewhere next game...

More next time, we hope to have Game 3 of Turn 1, next Thursday...