Saturday 17 November 2012

Free for Fall - LW 1750pts - Eastern Front - Battle Report - German GPgs vs Russian Armour

Paul and I met up on Friday night for another FoW game, this time back to LateWar, as we both had some new stuff we had recently completed and wanted to try out. In my case my Hummels, and in Paul's case, his T34/85's...

 I set up a battlefield depicting something hopefully Eastern Front in appearance, ready for the game.

I had taken my German GPg force:

HQ - CO w/ PF, 2iC w/ PK + AT PZSK team
2 x Full GPg, with Cmd PF and 3.7cm Cmd halftrack upgrade
Heavy Pltn - 2 x HMGs
Motorcycle Recce - Cmd + 2 teams
2 x SPAA armoured 3.7cm
3 x Panther
3 x Hummels

I combat attached one HMG to each GPg pltn.

Paul took a Russian Tankovy
some thing like;
HQ - 2 x T34/85 + Dedov
6 x T34/85
6 x T34/85
4 x SU122
2 x 'medium size' strelkovy SMG pltns
1 x 6 tube mortar pltn (no observer)
1 x 3 team scout pltn.

 We played a typical 1750pts, and rolled off Free for All as the mission, which I then won the roll off for who chose side and deployed first. I chose a side where I could hide my Hummels behind a suitable hill... Deployment complete below...

My CO and 2iC are reinforcing my right side infantry facing the immanent threat of Paul's Tanks which I am sure are about to ATD in my face!


I got first turn but couldn't fire a bombardment, and had no targets for my tanks, and only shifted my recce motorcycles over to add a few more bodies to try and defend the right side objective.

As anticipated Paul immediately ATD-ed his main T34 +HQ tanks down my right flank, and pushed forward with his SU's though one bogged in the woods...


... and explored forwards in the centre with 2nd T34/85 platoon just to keep the Panthers interested...


One SU took a chance pot shot at one of the scouts needing a 6 to hit, and rolled a six killing the scout with its breakthrough gun... first blood!


In my turn, I looked on the packed mass of T34s with some pleasure and trepidation and ranged in my Hummels, finding I could get 5 tanks under the template at the rear of Paul's formation, not realising I had just got the CO, 2iC and Dedov... I needed a 4 to range in and got it on the first roll. I then need 3's to hit the 5 tanks, and managed to hit 4 of them. Paul then managed to save two of them rolling 2 5+'s, but failed the other two, and my Hummels FP of 2+ destroyed those two tanks, sadly none were the important ones...


My panthers let rip at the centre T34s and brewed one up that had sneaked close to the cornfield...


Seeing all Paul's armour was busy on his left flank I decided to attack towards the other flank where only his SMGs sat hiding in a large corn field, and moved forward with my grenadiers and SPAA...


In Paul's next turn he pressed on with his T34 attack down the flank, and brought up his SU122s also. ..However my infantry held tight in the face of all Paul's shooting...


The centre T34s pulled back out of sight of the panthers behind the hill...


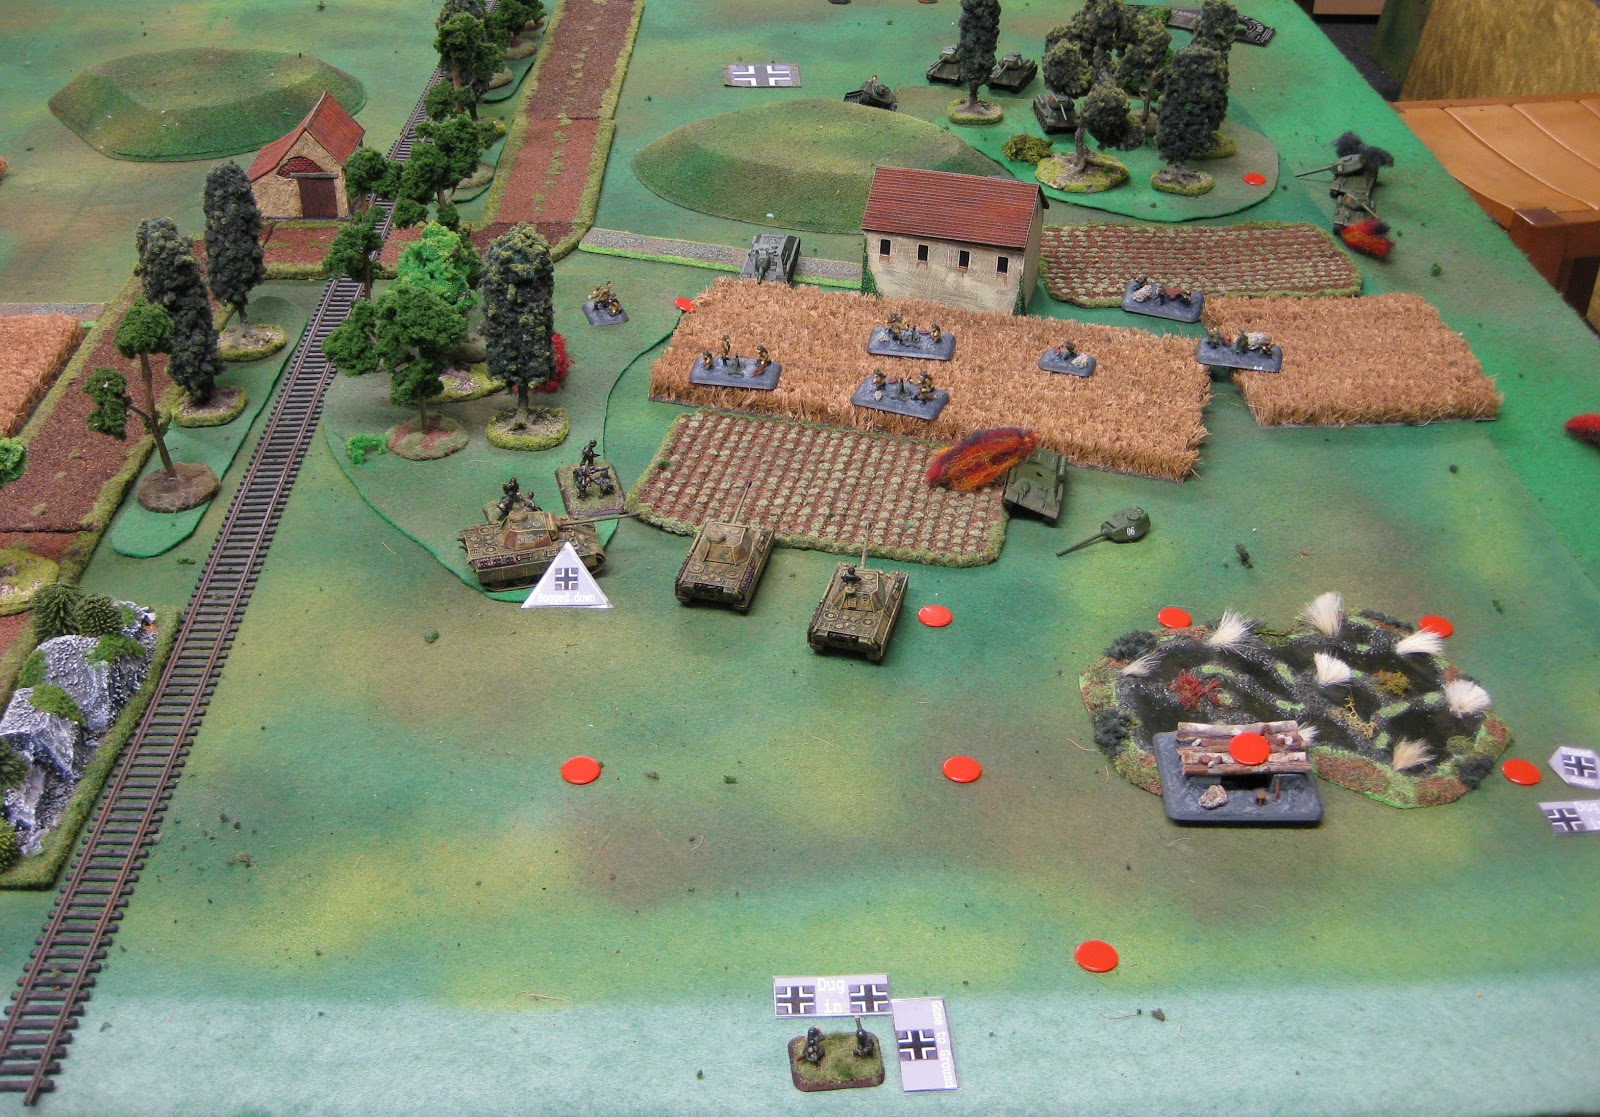
When Paul had made this move I wondered if he had made an error, as he had just parked two tanks in range of both my CO's PF and the AT PZSK team... (the two lower most tanks in picture below). Thinking I had a chance to knock out 3 tanks in one turn and possibly cause a morale check I laid on the fire and again zeroed in the Hummels, knocking out the T34 (next to Paul's knees below). Thinking I now had a decent chance to kill and/or assault/capture the bottom two tanks with my infantry AT weapons I let fire. The PZSK hit twice, but Paul's managed two 5+ saves ! And then the CO missed with his PF shot! Bugger!!! If I had simply bailed those two tanks they would have been captured easily in the assault! It wasn't to be... and this seemed to be where the tide turned against me...


I pressed on with my exploratory thrust towards Paul's SMG infantry but had to close (within 6") before I could see them to shoot... My Panthers sat tight. I wanted to turn them to face the threat to my right, but was wary of revealing flank shots from the centre T34s if they emerged from behind their hill...


Paul shifted laterally in front of my position...

... and then let rip with his SU122, with volley fire, having got his scouts in the building to lift GTG.... a whole pile of shots needing 5+'s and then a reroll of misses... and I get no infantry save against the breakthrough gun, plus its FP2+... It wasn't pretty ... 4 dead German infantry teams! Damn! If I had known what those blasted 122s were capable of, I would have been dropping the Hummels fire on them instead of the T34s...


In my turn, a little desperate now I am forced to start moving over the panthers and manage to knock out a T34, but my Hummels fail to range in, needing 4's to hit the SU122's...


I am ready to start putting some hurt on the Russian infantry. I had also called up my halftracks to lend weight of fire, but annoyingly they can't fire on the turn they are called up...


In the face of my Panthers Paul pulls back his remaining T34s, but the 122's fire again and obliterate my infantry... They fail a Morale check and I don't want to risk losing my CO to save two teams so let them depart... At this point I feel it's all over, Paul just has to roll forward and sit on the objective...


Also Paul's centre T34's ATD over to defend their cornfield-hugging comrades... Quickly realising I can't stand up to this armour, I swiftly retreat, ATD-ing the half tracks back behind my wood and the infantry head for the small cornfield...


I start advancing my panthers to try and get some shots on the 122's but only bail one out, and again fail to range in my hummels... my scouts have moved up to protect the panthers and hope to get into woods to their left by rail line.


I try and launch an assault with my panther in wood to Paul's mortar teams in the cornfield but it bogs down, and the others are too far away to reach... So the Panthers fire again at the SU but they still only bail it. I am holding this flank still thanks to the panthers, as Paul has pulled everything back away from them...


Paul now decided its time to go for the throat on the other flank, as my panthers sadly can't be in two places at once, and my hummel spotter seems to be holding his binoculars round the wrong way...


Paul manoeuvres a little on the right still, possibly trying to sucker the panthers up closer in hopes of then being able to swing round past them down the rail line... he does manage a one off shot with a mortar team that moved to edge of cornfield, to get a six to hit my CO, which he does. I then promptly fail my infantry save and Paul's gets his 3+ FP test, and his 4+ Warrior kill, and my CO is toast. Ah well, when it's not your night... still at least I have my 2iC still who in V3 can take company morale tests.


Paul now brings the hurt and starts advancing on my infantry MGing 2 teams. He also advances and assaults with his infantry but they are shot back in defensive fire needing five 4s from 7 dice, which I manage, but though beaten back Paul passes all 5 infantry saves... Still at least I am still alive!


In my turn I manage to get forward with my scouts and with the panthers who MG some of the mortar teams, they assault the last mortar teams elements and kill them. I finally kill a platoon and get a Point!


On the other flank its still not looking too good though, but there is two tanks in the open and all I need is a 3 to range in with the hummels... I roll three 1's consecutively... at this point the artillery template if flung across the room! Paul murmers I should really have thrown the offending dice! He has a point...


Paul starts advancing his tanks down the rail line, but they still have a fair distance to go and the three panthers are still active...


Paul continues to pressure, the other flank with his T34s and infantry advance... but, time really is running out on this game, we started at about 7pm and its now 11.15pm... that's about 4 hours of game time and we haven't exactly been playing especially slow...well more than the typical 2.5hrs allowed for tournament play at this points level... and besides if Paul doesn't get home soon he'll turn into a Pumpkin!

So there we leave it...


Final positions above and below pics...


Final score 1 point each, I think, we both lost one platoon. A hard fought game to come away with 1 point. If we had played on Paul would eventually have captured the left hand objective though it may have taken a few more turns... but at some point you have to call it for time, and we had played our damnedest!

I was happy to come away with a point, after my initial good start, with my hummels, they failed to hit anything again after the second turn... My artillery template, now having found its wings, has put in for a transfer to the Luftwaffe!

Wednesday 31 October 2012

Painting German Camo

I get quite a number of compliments on my German forces camo scheme.

It really is rather simple to achieve so I thought I would share with you how I do it, in a step by step format. Hopefully I may inspire a few budding German commanders out there to give it a go...

I'll demonstrate it on a platoon of 3 Panzer II L 'Luchs', but it will work just as well on any German vehicles.

First up assemble your models! Obvious really or you will have nothing to paint!
But main things to remember, do break out those needle files and get rid of excess metal and resin flash, and mould lines. I assemble my vehicles using superglue and a superglue accelerator spray.

Assembled tanks
Once assembled and the glue is dry, undercoat them black. I use a DIY metal primer spray from Plastikote. Cheaply available from local DIY stores and cheaper than the hobby branded paints.
A quick point about spraying vehicles that are not on a cast resin base... do it in two stages... spray the top, let it dry then turn it over and spray the bottom. Likewise with the turret, do these separate to the chassis, assuming you have ones that come off!
Once the spray is dry, touch up any areas the spray has missed with a little slightly thinned black paint.

Black spray undercoated
Once we are all nicely undercoated, now add base colour 'dunkelgelb'. Again I use a spray for speed and ease of use. Battlefronts cans of armour spray paints are excellent. I use their German Late War Armour. Repeat procedure as above, two stages; top and bottom. And once dry touch up any missed areas with a little vallejo "middlestone" paint. Not as crucial here as any missed bits in crevices will be black and in shadow, thanks to the undercoat.

Base sprayed 'Dunkelgelb'

Next I paint the tracks, in dark red/brown ( I use GWs Dark Flesh)

Tracks base painted

Next up I start adding the camo pattern. No I don't use an airbrush! Just regular paint and brush...
Again I use the GW Dark Flesh for the brown and Vallejo 823 Luftwaffe Green for the green.
Now at this point you really can do what the heck you like - stripes; broad or narrow, spots; big or small, a mixture of both, anything goes...

Brown Camo pattern painted
You can do either colour first, and overlap them or not - you really can do anything - from what I have learned the tanks were rolled off the factory based painted yellow, and the crews were issued the camo paint to do themselves, so anything goes!

Green Camo pattern pained
Once dry I now shade wash the whole vehicle in my 'magic wash'. This is simply a 50/50 mix of Vallejo Sepia and Vallejo Black washes. Put it on thoroughly but try not to let it pool too much, spread it about a bit and blot off any excess with a dry brush tip. Again with unbased vehicles you may find this easier to do in two stages; top and bottom of model.

Shading wash with 'magic wash'.

Again once dry, now go over the whole model with a dry brush of Middlestone. I try and avoid hitting the tracks excessively but you will catch the edges no doubt, don't worry. Keep dry brushing until you have a nice blended look to the vehicle. The dunkelgelb will have brightened up, and the brown and green will have a sort of patchy. dirty almost translucent kinda look to it.
Tricks to dry brushing vehicles - use a big broad soft brush, and load a dry brush with the paint (don't wet the bristles first as you do during regular painting), before rubbing off excess on a tissue. Use quick light strokes back and forth with the brush, and as you use up paint on the brush you can slightly increase pressure and also can use a stippling effect with tip of brush (stabbing brush end downwards onto model), useful to get to areas where a swing of the brush can't reach...

Drybrushed with vallejo Middlestone

I now fix up those tracks where they have got caught by the yellow dry brushing, by heavily drybrushing them with mid brown for a nice dirty. dusty look.

Tracks drybrushed brown, details painted in dark brown
Now the detailing...I now paint any items of tools, stowage etc a dark base brown - I use GW scorched brown. Then paint these items as they require, tool handles I paint GW bestial brown, metallic items like shovel heads I paint GW boltgun or vallejo gunmetal. The exhaust I paint GW TinBitz.

Exhaust painted dark brown

Detail items

Once dry, give a light wash again of the 'magic wash', just to give them a little shade. Same goes for the commander, and any other passenger/crew figures your model may have. I then pick out the flesh tones again for a bit of highlight, and retouch up regular German uniform colour. With the black tank crew uniform this isn't really necessary.

Wash details with 'magic wash'
Dry brush a little black on gun barrel end, to make it look like its been firing.

And that's pretty much the painting done, just add decals to finish.

To add decals, I first add a thin layer of polyurethane gloss varnish to the site the decal is to go. This gives a smooth surface for decal to adhere to and minimizes air being trapped under decal which can lead to 'silvering' Once dry add your waterslide decal. Position, and blot off excess water with a tissue or dry brush. Try to squeeze the water out from under the decal using a rolling action of brush across top of decal. Leave to dry.
Once dry, give a light brushing with Decal softener.  This helps flatten the decal into place and can dissolve away the silvery grey film-like edge to decal. Go easy... too much softener and you can wreck the decal!
Again once dry, I go over with another layer of Polyurethane gloss varnish to seal it into place. Again do this with a very light coat as decal may be a little soft from the decal softener. At same time varnish rest of vehicle with the varnish. After all that effort you want to protect your paintwork.
Again, top and bottom at a time.

And finally, as I can't stand that shiny gloss look on model soldiers, now go over with a brush on matt varnish. I use Vallejo Matt AcrylicVarnish. It takes some nerve to use, as its like painting your model with thin PVA glue, but spread it thinly and evenly and allow to dry, and you'll have a perfect matt model.


Excellent work, your troops are ready for the table top! Give 'em hell!


Saturday 27 October 2012

Inaugural Game at Pauls new swanky gaming pad

As mentioned in his prior post, after much work toil and graft, Paul now has a very swanky new gaming pad, complete with height adjustable gaming table, storage cupboards, and space for 4 players to get together over an 8' x 4' doubles gaming space.

So we had to have an inaugural game to see the new pad in.

The scene was set; a doubles contest pitching the dastardly Kraut against an alliance of the Yanks and Canadians in a MW setting, though it has to be said, since forces were selected from both North Africa for the Allies and Eastern Front for the Axis .. an interesting milieu developed...

Paul had pre set up the field of battle, and made the call that forces would 2200 pts per side, so 1100 points per command with 200 available for swapsies... The Mission was pre-determined as Free for All.

The Allies; Paul and Brett selected their forces - Brett taking a Yank Paratroop company, and Paul going with a Canadian Tank company. 

The dastardly Krauts; Bob and Scott selected two infantry companies. Scott would go with the more defensive formation of Grenadiers, with priority Stukas, in support of the more attacking Pioneer formation of Bob, assisted by a Tiger IE, and a captured KV1...

I must apologise before hand as my picture taking was a little rushed, so many shots were a bit fuzzy, but hopefully you get the idea.

The battlefield was dominated by a central Luftwaffe Airfield, with wooded hills to one side, and a village on the other.

Brett just checking the first deployments of US chocolate, K-rations and prophylactics

All set, ready for the off.

In picture above, the Germans are on the right, the Allies to the left. Scott's grenadiers are spread along the base line defending both objectives, with PaK38s on the right flank hill over looking the village, and heavy mortars and light AAA in the centre. (The allies failed to bring planes so the AAA was a bit of a waste of time). Bob has loaded one flank with 2 hefty pioneer units assisted by the Tiger. The KV1 is behind the hill defended by the PaK38s.

The Allies have their 25 pdrs supporting main thrust of Yank Paratroops  through village backed by some Canadian Shermans. Their centre has some Yank medium mortars and the woods holds more Yank infantry assisted by yet more Shermans.

IIRC , Allies got first turn and started digging stuff in where necessary for Free for All, except on the tarmac road, its jolly tricky getting a spade into asphalt! Not much else happened. The Germans responded by cunningly digging their troops in also, but made dashing moves with the pioneers on the left flank


The Yanks started pushing up their paras through the village, to be met with heavy Mortar fire from the Germans,... not pleasant. The first round of stukas had seen a great block of infantry just waiting for a pounding, but had failed to identify the Yank AAA infantry platoon - that came as a shock, but the plucky pilot managed to get his parachute to work!

,

 The KV selects a shooting avenue to dissuade the approaching Allied Armour...


Its all go, Brett ponders what to do...


With the threat from the pioneers, Brett shifts the central Yank mortars over to assist the threatened objective in the woods, but not before landing a very nice mortar bombardment upon on the pioneer platoons heads killing several teams... However in subsequent turns the stukas now found this mortar platoon marching across the open a target too tempting to resist...


The Yanks continue their advance through the village but are paying a heavy toll from heavy mortar fire... the KV has also advanced to  make its presence known.


The Tiger starts to get to work, knocking out a Sherman on the left flank... we tried to make things fair for the allies painting our Tiger in a bright white camo pattern for the sultry summer clime to aid their targeting , just to give them a sporting chance. We considered adding 'go-faster' stripes too, but thought this a step too far towards Essex boy fandom... my Tiger's better than your Sierra Cosworth any day! ;-)


The Shermans are not sure what to do...  trying to avoid the gaze of the Tiger, trying to stay spread out and near woods because of the stuka... life is not a happy one for the commander of a 'Ronson'...


Meanwhile the Yanks keep pushing through the village waiting to see what happens between the Shermans and KV... the Yank Tank destroyer ambush jeeps are also steadily working inconspicuously into position...


KV ready to greet a Sherman... through the woods...


 Hello... boom!

 Tiger says hello to another a Sherman, the rest pull back behind the wood, covering the objective...


The sneaky Yanks spring the TD ambush, unleashing 2 M10s upon the much maligned KV, but only manage to bail it...


 Meanwhile the Tiger continues on its prowl...


Oh dear, a bailed tank is not problem at all to assaulting infantry... no tank terror test required, insert explosive charge here... boom! Still the KV has tied up several platoons of Allies over several turns, its earned its points...


The Allies are still trying to force the issue on their left flank, but now the PaK38s are an issue for the Shermans ...


PaK38s bail the M10s... heavy mortars land as well but only annoy the infantry...


Pioneers get busy with the fizzy, and launch their move and assault into the Yanks in the woods, assisting the Tiger who has already squished a few...


Brett's return fire, needing 5's to hit veterans in the woods... er that will be none then...


A Sherman tries to get sneaky behind the hill, forcing the PaK38s to turn to fire...


But its all too little too late for the allies, who are left verged on the point of an assault if only they could silence the PaK38s...one had been summarily dispatched but the others stubbornly refused to die, either passing saves or surviving repeated failed firepower tests from the Shermans and M10s... I lost track of how many times they got 'bailed' ;-)


Wallop, its all over Yanks, go back to driving Miss Daisy coz you aint driving nothing here... Pioneers and Tigers do the business and it ends messy for the Allies with little left at all in the wooded objective, Tiger and pioneers rampant!


A thoroughly fun game, with much banter an carry on.

And some beers to see the new room in, with some pizza from Paul's good lady Tina - many thanks from all...

Looking forward to many more in Pauls fine establishment...

I believe the game ended 5-2 to the Germans.

Stay tuned for KapitiFowGamers next exploits...