Showing posts with label Battle report. Show all posts

Saturday, 25 May 2013

Breville Campaign - The defence of Breville - Fighting Withdrawal

Since starting the Breville Axis of Attack campaign, the British paras, under Paul's skilled hand, have done all expected of them, landing in a glider borne assault to capture the Orne bridges, resisted repeated attempts by the Germans to break through their lines, and then gone on the offense, beating the Germans back out of Bois du Mont, their fighting withdrawal there becoming a rout.

The Paras push on to capture their last objective, the town of Breville itself, and close out the campaign...

The Germans have one last chance to salvage a small amount of pride, before the end... And this time their Commanding Officer has been given a rapid schooling in the art of holding ground with Infantry...

 Having won the last battle and the dice off for the next game to choose the mission, Paul has pushed me back to Breville, and has decided on a Fighting Withdrawal to try and seal the fate of the Germans. Paul set the board up and I came along with 1750pts of Grenadiers, against Paul's British paras...

The German Force

Pauls forces, IIRC...

British Airborne
HQ: CO + 2iC + 2x PIAT
Full Paras platoon
Full Paras platoon
Full Paras platoon
Para Engineers platoon
Commando Section
2 x 6pdrs
3 x DD Shermans + 1x Firefly (Confident Trained)
4 x Mortars

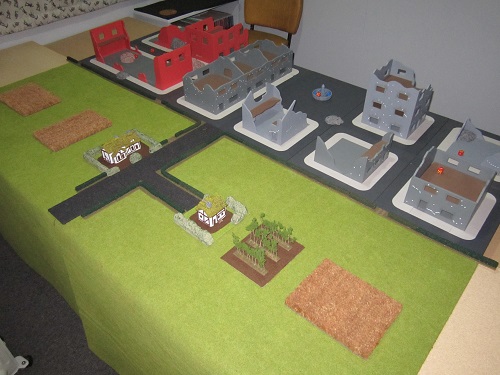
With insufficient buildings to create the right look, Paul instead took a different approach to setting up the town, and went for a full ruined town edge look, using the 'Stalingrad' building set he made!

Paul managed to bring these two sides of the boards into alignment raising one section on a slightly raised platform. Very clever I thought!

The outskirts of Breville
Having learned how not to defend with infantry in the last game, I took Paul's advice, and this time set up a high perimeter line on the edge of my deployment zone. The three objectives were spread across my zone with typically, the defenders one in the centre and the attackers two to the two flanks.

The pioneers covered my exposed right side of the board, behind their barbed wire, and backed up by 2 infantry guns and 2 HMGs. In the centre a grenadier platoon with attached HMG and P'schrek team, and backed up by my scouts with assault rifles. On my left another Grenadier platoon with attached HMG, backed up by 3 Pak38s. My 2 mortars were centre back holding centre objective . The 5 PzIVs were in ambush...

Pioneers defend the German right flank

Paul decided to mass his main attack on his right, not wanting to have to deal with my wire... which was more or less as I expected. So I added my 2ic and CO to the end flank building.


Paras, commandos and Shermans backed by mortars ready their assault under cover of darkness

Looking down the German line from their left flank

Paul pulled night attack and with it the British spearhead move. My high line of defence did impede this move, slightly. Undaunted Paul pressed on with his attack getting into it quickly with Commandos and Paras, looking to make some holes with flamethrowers...

The panzers reveal their ambush from behind the left flank end buildings and drive up ready to hose the attacking infantry...

Initial attack, 2 flamethrowers are expended for the loss of a single German team

The bold move by the commandos flamethrower is rewarded by a hail of return fire which guts the commandos and they break and flee. Still undaunted Paul readies his assault with careful precision and manages to breach my line...

Paul gets excited with the casualty markers... there weren't quite that many deaths here , yet...

Its all on like donkey kong! I have lost the end grenadiers, 2iC and a panzer to Paul's assaults, but my Co has fallen back out of harms way. All this time my scouts have been rushing across from the centre, as have the 2 HMGs from the opposite flank, trying to help reinforce my faltering left... But Paul still has the pak38s and panzers to deal with...


Its all on big time!

A surge by Brits, and everything fires trying to knock out the pak38s and panzers to little effect! But the assault still goes in capturing the end flank building and forcing me to pull back the guns and tanks slightly....


Paras capture the end building, but objective is still strongly contested.
Pak38s and panzers return fire at the Shermans killing two and bailing the other 2 but they pass morale!

Now comes the craziness, with nothing to lose, a real do or die, Paul emerges from the building, and with a combination of fire, destroys a Pak38, bails a panzer with a Piat, and assaults the remaining panzers, staring down 12 dice of def fire on 4s. I push him back just... 3 dice are 4s, 2 are cocked, I roll these again, one 4 the other cocked again... I can't bare the tension! I roll the last dice again, a 4! And he is pushed back!

Paul then throws caution to the wind and has the 2iC join the 2 remaining Piats from a gutted para platoon and assaults with these! 12 def fire dice again... I pick my dice back up counting as I do and suddenly realise I had thrown 13 dice previously! What to to do? Paul resets his main para platoon again , "thrown em again Scott!" Eek! I do but get 5+ definite hits pinning back the main thrust. So Paul still tries with the 2 Piats. 12 dice again and again they are thrown back. But Paul's is rolling saves like a god again and few if any of the paras fall to the def fire.

Day light had also broken at start of turn 3...

In my turn I think, right, hose the lot of them down and that will be the end of it. I fire everything that I can. But Paul keeps rolling so many saves. Only the engineers are finally stopped , reduced to three teams and the Pltn Cmd dead, they cannot advance. But the main paras still pressuring my panzers refused to die.

To make matters worse the Shermans remount and let my Panzers have it! Paul lines up everything shooting all he can to get pins and or destroy teams in the crucial area. He's done all he can and assaults once more.

Defensive fire from the remaining Pak, Scouts, CO and lone observer spit out just enough fire to throw back Pauls assault.


Paul gets ready for his crazy assaults!

Its now almost midnight, we've played for over 4 hours and although contesting the flank objective, I am now in a position after some 5 turns to be able to pull this flank objective out from under Paul. Even if he does get it next turn, it will then vaporise and he will be in no position really to push for the other objectives in any sensible time frame, and I have enough platoons remaining such that he is unlikely to break me, and I still have my CO alive, for a change!

So Pauls calls it. The Germans have held on for their first win of the campaign, and as they started with 9 platoons and only lost two (Grenadiers and Panzers), claim a 5-2 win.

Final positions
To say this was a nail biter is not the word! This mission is always a real sod, especially for the defender as you always feel you are hanging on for grim death. So I am thrilled to have come away with a win, especially over Pauls Paras after the gutting I got last week against them. And I have to say most of that comes from Paul giving me some idea of how to set up and run a defence with infantry.

He may be wishing he hadn't told me now???

So I claw back some VPs for the campaign and post game dice rolls show Paul still has the initiative to try and attack again. He chooses to try Surrounded for the next game...

Monday, 1 April 2013

'Easter Foolery' - a mini Fow Tournament

Some months ago now, the bunch of us 'KapitiFOWers' took part in the Wellington Warlords Call to Arms 2 day Gaming event, playing 5 games of FoW, over the 2 days.

Though we enjoyed the experience we all came away feeling slightly frazzled, and of course there is the required 'brownie point' expenditure required to commit to these kinds of things; we all have families to keep happy too, and a full weekend away to play toy soldiers requires a fair bit of sucking up to the Mrs!

 So when we heard the next major tournament in our area was to be the 3 day tournie over at the Hutt club over the Easter weekend, I think we all kind of thought it was a bit of a stretch too far, in terms of actual enjoyment, and we wouldn't be winning any favours on the home front.

So in lieu of taking part in this event, we decided to spend one day together over the Easter break and enjoy one full days gaming together. When it was explained to our respective better halfs, the sacrifice we had made for them, we all pretty much got their blessing to organise our game day!

The initial plan had been to try our hand at one big Total War game, two a side, pitching up something like 5000 to 7000 points per side, troops allowing, which was going to be a MidWar setting, selecting troops from the North Africa book as that seemed suitable for all the troops we had.

But with only a week or so to go till the event there was still no clear cut plan in evidence, and so a pretty much last minute change of thinking, changed our games day into a mini tournament instead.We agreed on a Midwar setting of 1500pts per player.

The 4 players would mean 3 games each over the course of a day, so we'd each play each other once on the day. Nothing could be fairer.

We had previously selected the last day of the weekend, Easter Monday, which also turned out to be April Fools day, as our games day. Paul turned up on Friday night as previously agreed to help set up the two tables we would fight over beforehand, to help speed up the start of gaming on the day. I managed to come up with a roster chart to pre-plan who would play who, and we picked three missions. The first game would be the classic mobile battle Free for All, followed by the equally classic No Retreat, and finally, something a bit different to end the days gaming with; Breakthrough - always a bit of a mindbender of a game!

Finally Paul mentioned we would have to name the event and have a trophy perhaps? Bugger ! I hadn't thought of that! With two days to go I decided to try and make something appropriate... Paul had already created his Snake Eyes totem trophy for his Hootenaney, so I'd have come up with something...

Putting Flames of War, Easter and April Fools day together, I came up with a large chocolate coloured flame trophy which was lashed out of an off cut of timber and a piece of MDF over two days... the final varnish going on at 10.30pm the night before the event. By this time I could barely see what I was doing in the garage with the poor lighting and typically, the varnish didn't go on too well, but hey, what the heck right?

On the day my wife Tracey went down to the local shops and managed to find a store that was open that did a small inscription plate for the trophy - Flames of War Easter Foolery was ready!

The trophy up for grabs...

... with its freshly done inscription...


Being the playing host I was also charged with taking some pictures and playing my games. As such I only really managed the deployment pics and I will comment as best as I can in the following 'report', and welcome the other players to add their own thoughts and comments at the end...

I had taken from Eastern Front, my typical Gepanzerte Panzergrenadier force;

HQ - 2 x Cmd SMG P'Knacker plus Puppchen, with 3 x 251/1 and Remer in a 251/1
2 x Full GPG Combat platoons, with Cmd P'Knacker and 3 x 251/1's and a 3.7cm 251/1 command half track
2 x 8 Rads (recce)
3 x Marder H
4 x PzIII H
3 x 15cm Nebelwerfers

My first game was drawn against Paul who had brought his Soviets, with IIRC:

HQ with Cmd and kommisars, and AT rifle  teams
2 companies of infantry, with some Light AT guns and HMGs
3 x KV1s with Tanks Escorts
'God of War' artillery battery  -  with 4 howitzers and a whole bunch of AT guns, a terrifying prospect!

We played Free for All...

Paul won the roll off and picked the left side, and we deployed in alternating fashion... I decided to defend and hold the left objective  in the town, with a GPG and the Marders in the face off against his KV's, and to attack the God of War on my right flank... with everything else, with nebs in the middle...

Our deployment...


I have played Free for All several times, and rarely achieved many points at it, usually playing too cautiously, so this time I thought sod it, lets go get some... and if I died, so be it, at least I'd have some fun shooting stuff up on the way!

For the most part Paul sat back in the face of my attack hoping to destroy me with his fire, whilst he was far more cautious in his approach on the other flank.

Over a couple of turns I made good progress on the right and was I soon in a position to assault, having lost a recce vehicle and a couple of panzers along the way. The initial assaults went well, and Paul started pulling back in the face of the assault and trying to bring his guns round to bear. At the same time he had been making tentative probes with his KVs through the town, but was hampered by reduced lines of fire at the Marders, and the Marders let themselves be known bailing a KV at range...

Eventually the weight of my assault continued to sweep Paul back from the objective with a combination of the remaining Panzers, Remer, the recce and the elements of the GPG platoon succeeded in damaging and forcing back Paul's God of War and infantry that the right objective was captured, for no loss in platoons to myself!

I was quite stunned by this course of events! A 6-1 to me!

Over at the other end of the table, Brett was playing Bryan.

Now it must be said, Bryan turned up with a force of German troops that he wasn't even sure would fit a list? We quickly had got down to using EasyArmy online with Bryan's available troops, as he had turned up early to do so, (I heard the doorbell go while I was in the shower!), and came up with a Panzergrenadier force, that comprised;

HQ - 2 x Cmd P'knacker, plus staff car and motorcycle
2 x 3 squad Panzergrenadiers with Cmd P'knacker
2 x armoured 2cm self propelled AAA gun SdKfz 10/2
1 x Tiger 1E
2 x StuG G
4 x 10.5cm Howitzers

Bear in mind Bryan hadn't used this force before, it was simply cobbled together to give him a force to use on the day... Bryan normally plays a Late War Brit force; "Taurus Pursuant" - A Market Garden themed force...

Brett had brought his American Tank Company comprising, IIRC:

HQ - 2 Stuarts
4 x M3 Lees
3 x Stuarts
3 x Scotts
3 x HMC 75mm self propelled Assault guns
3 x 81mm Mortar carriers, plus Cmd Half Track.
1 x Armoured Recce platoon (2 x jeeps plus 2 x white scout cars)
2 x 105mm Field Howitzers
1 x Sporadic Air

 Their deployment is as pictured below...

As you can imagine, I didn't get to see a lot of what was going on, but as well as I understand it, Brett found a small gap in Bryan's defence, a 1" gap between the wood on Bryan's left (next to the finger below) and the table edge, and exploited this to drive a tank force round into Bryan's 'backfield' !

I am not sure how long this took to resolve, but do know it resulted in a 6-1 win to Brett.


In my second game I was up against Bryan's Panzergrenadiers in No Retreat. Being Mechanised infantry against Bryan's Motorised infantry, I would be the attacker... Deployment as below... Bryan placed an objective centre rear protected by artillery, and I placed an objective on my front left, near a small farm. This Bryan protected by one PzGr pltn. He had his StuGs in ambush...

{It was at this point that I had that sinking feeling, staring at my list in my hand I realized I had got confused in my game against Paul previously ( I had tried several list variants through the lead up games to the event, and upon deploying had put down the wrong recce elements - picking a 250/1 plus 2 x 250/9s [proxied by 8Rads] as a Half tracked panzerspah platoon, when really I had actually just picked the 2 x 8Rads as a Heavy Panzerspah platoon). I mentioned this to Paul, expecting to have our game result invalidated... but Paul, thinking back to the game, and knowing he had partially damaged my recce in our game, said, "roll a dice... on a 1-3 I score a point against you for that game"... dutifully enough the die tumbled into place, and we adjusted our score from a 6-1 to a 5-2. I couldn't ask for a fairer result. }


Back to my game with Bryan. I decided to try and attack both objectives to try and keep Bryan, 'off balance'... I went with a GPG and PzIIIs plus Remer against the front objective, and sent the other GPG, Recce, and Marders after the rear one.  The large wood in front of me would cover my left approach, and the Recce would hopefully prevent a nasty StuG ambush on my right...

Within a couple of turns I was severely pressuring the front objective and heading for the rear one too. The 8Rads had killed the forward observer for the Howitzers in an assault on their way past ... I had just about captured the front objective, when Bryan finally sprang the StuG ambush. This blew away 2 of my PzIIIs and bailed a third, but the platoon hung on in there.

In the next round I destroyed the remnants of the front defending infantry with shooting, and started my attack proper against the rear object, setting up an assault through the rear farmhouse position.

My marders fired on the StuGs but only bailed one, which remounted. My assault went in against the rear farmhouse and fought their way in, the 8Rads having knocked out the SPAA, (which had previously come on to add weight of def fire to the Howitzers), to reduce Def fire.

I held the front objective and although Bryan's Tiger came on at this point it was too far away to help, forcing the StuGs and the CO to try a last gasp assault to reclaim the front objective. The StuGs battled their way in gamely, but were eventually overwhelmed by the Infantry Panzerknackers and bogging checks in the terrain, and if I recall correctly a failed motivation check forced Bryan' s remaining StuG to break off, leaving me with the objective. ...

Bryan capitulated, giving me a 6-1 win!


At the other end of the table, Paul and Brett were having the game of their lives! Deployment below...

Paul was defending and had decided to ambush with his 'God of War' against Bretts Tank force. Sadly for Paul this had not gone as well as hoped for... and Brett battled gamely through Paul's front lines eventually pressuring and virtually claiming the front objective. The game actually paused for lunch as it was taking a while...

After lunch (Pizza from Domino's plus some spicy extras from my wife), we returned to the fray for Brett and Paul to finish whilst Bryan and I looked on...

By all reckoning Brett had 'captured' the front objective, but had taken a heavy toll, in getting there, and Paul was staying alive in the game by feeding troops in to contest the objective, and having his Komissars shoot anywone who thought of faltering... eventually with Paul's KVs getting in to the fray, despite Bretts Planes giving their best efforts, Bretts tank force finally failed a company morale check, having passed one the turn before, and although sitting on the front objective was forced to withdraw due to loses...


Towards the end ...


Game was a 5-2 to Paul, but it was so keenly balanced on a knife edge it could have gone either way towards the end...

A large intake of breath and we plunged on into the last games of the day...

I played Brett in Breakthrough, while Paul and Bryan squared off...

I looked long and hard over the battlefield and came up with a plan, hoping Brett, might give me an 'easy run' through the town to sit on the objectives with my infantry and hope to dig in before he got there. It was a bit of  long shot but I couldn't think of any other way of managing this. I also lucked out in that he chose to allow me to run toward the church which my newly made walls surrounded, giving me bullet proof cover even if I didn't manage or have time to dig in once I got there...
This is a nasty game for a GPG force as due to the Mobile Reserves rule... I can only have one mobile force on the table. So my infantry would have no half tracks, but against a tank force I didn't really see this as a problem, other than slowing me getting to where I wanted to be, but hopefully there would be enough cover on the way...
I decided I needed my Marders on the board to hope to start sniping Brett's tank force as he approached.
I would leave my nebs, recce and PzIIIs as a reserve.

Deployment below... my infantry are poised for a dash to the objectives, while the marders wait behind the cafe to unleash their fire on the unsuspecting American tanks...


Brett launched off with the first turn, with his Priest battery selected as the end around 'reserve' force. Brett's logic being their 50 cals to shoot up infantry plus their breakthrough guns to blast them out of foxholes... cunning b*stard! ;-)

Brett never being one to hold back, rushed everything forward, including 'at the doubling' his Mortar carriers ... his first turn of shooting was ineffective...

 In my first turn, I managed to get reserves straight away, and selected my PzIIIs to come on behind Brett's ATD-ing mortar carriers... in the meantime my infantry scampered towards the objectives... and the Marders popped out behind the cafe for some shots at the target rich environment...

The PzIIIs let rip and blew away the 4 mortar carriers! The puppchen who had remained behind nailed a Stuart but the Marders failed to find a mark. I decided to leave them were they were hoping for six shots next turn and hoping Brett would fail to hit them on 6's... and he had 4 PzIIIs coming up behind his forces to consider...

Brett swung round his Lees to engage the PzIIIs, called in air to hit the Marders, and chased my infantry through the town with his recce whilst pressuring the front objective with his Stuarts and Scotts...

The results being 2 bailed PzIIIs (I can live with that!), but wrecked the Marders which fail morale and flee ( I carelessly left one vehicle a fraction away from the building allowing the plane to auto range in! Damn!)

My infantry mostly survived these attentions too and got into position contesting the objectives, but for how long would they hold out...

The PzIIIs remounted and looked back with 12 shots at 4's against the Lees... but I only managed to bail 2, and they both subsequently remounted... oh dear...

Brett remounted and blew away the PzIIIs, the last failing morale...

Towards the end things got scrappy through the town... Brett's Stuart's and Scott's pushed on over the bridge, the recce drove in through the town eventually assaulting one GPG platoon at the church whilst the Priests arrived from the reserve... the writing was on the wall for the Germans... but could I get any more points out of this game...?

Oddly enough, Brett chose to assault with his recce, presumably trying to bring the game to a swift conclusion... but I hung on destroying 3 vehicles, with only a 4th left between me and another point...

Remer hung on gamely in the churchyard thanks to the churchyards walls, and kept me in the game a fraction longer... my nebs had arrived as had my 8Rads, and the 8rads belted in down the road in the town to shoot up the rear of the last of Brett's recce elements but only managed to bail it! Curses.

I survived another round of Brett's all encompassing attention, losing my recce and having the church infantry platoon gutted... and only Remer contesting the church objective against the Priests...

But a last gasp saw smoke from the nebs hit the bailed recce vehicle as the CO and remaining Pltn Cmd team assault it in the face of two Stuarts in the town square.

They passed 'tank terror' and assaulted the bailed recce vehicle destroying it, but drew in the two Stuarts... after a couple of rounds I almost had them both, but eventually only managed to destroy one before my CO was squished beneath their tracks...

I was vanquished but had given Brett a bloody nose... a 4-3 to Brett!

At the other end of the table, Paul and Bryan played it out.


It took Bryan a moment to realise the danger he faced in his 'backfield' from Paul's potential end around reserve run, which he lined up with his KVs and an infantry company.

I am not sure how this played through, but Paul eventually emerged the winner as his reserves arrived and battled their way to take the objective, though for the loss of the KVs I believe, resulting in a 5-2 win for Paul.

So what would be the final standings?

A final tally of the results saw me emerge the victor with 14 points, Brett and Paul were tied on 12 points and Bryan brought up a very sporting rear with 4 points.

So I won my own trophy! A chocolate flame!

L to R, Brett, Paul, me and Bryan

No doubt it will be up for grabs again next Easter, I may be able to fit another table in and entertain another pair of contestants!

It has to be said this was an excellent and fun 'tournament', with much banter and humour, Bryan especially keeping us entertained with an amazing array of impressions and accents throughout the course of the day, he really brings a little hilarity to such events!

Special thanks again to Tracey my wife for keeping the troops fed and watered, and my daughter Rebecca for doing the running back and forth with the tea and coffee orders. And of course thanks to my gaming buddies for making the event an enjoyable experience. Excellent stuff!

Saturday, 9 March 2013

Grey Wolf and Red Bear in Late War Pincer

After quite some time since my last game against Paul, I managed to get back in the driving seat a little, having enjoyed several learning games with my wife in the meantime. I have to say she continues to do well in learning the game and her interest continues to grow...

During this time I had a little chance to think more about gaming with the Germans and the particular force I favour; mechanised infantry in armoured half tracks... This force has been an ongoing challenge to get it to perform adequately under a range of conditions; different list builds, missions and foes.

Also going back to the various tactical articles on the FoW website... a few key statements about this force, stand out; it is a brittle force... it must rely heavily on its support platoons... it must make use of its mobility, and use it to its advantage. It seems generally accepted that it is a tricky force to get the mastery of, and to get it to perform well consistently...

So it seems I am not the only one finding this force a challenge to use.

With these thoughts in mind and the realisation that with this force, most of the time its going to be a tough slog, I finally decided I should just enjoy the ride, and get out of it, and the game, whatever I can.

So I went back to the list and tried to come up with a balanced force that could have a chance in most circumstances.

I came up with the following:

Late War 1750pts, from Grey Wolf.

German Gepanzerte Panzergrenadiers.

HQ: 2 x P/faust SMGs and 1x P/Schrek, plus 3 x 251/1d
Combat platoon; Full GPG, with Cmd P/Faust SMG, and command halftrack with 37mm
3 x Panthers                                             ('Medium' tank as long ranged tank killer)
3 x Panzer IV H                                       (Medium tank - infantry support)
2 x Half track Flamethrowers                    (Infantry Assault support)
1 x Recce; 1 x 250/1 + 2 x 250/9 (2cm)   (Reconnaisance)
3 x 15cm Nebelwerfers                            (Artillery to smoke and pin)

I asked Paul for a game to try this out, though didn't explain specifically what I was going to use, just asked him to come with a 'balanced' force, for 1750 LW.

The terrain was set up beforehand with the typical farmland and wooded environ.

Paul rocked on up and we chatted the usual stuff, and discussed the list I had come up with, and how I hoped it would work and play. Paul agreed with my thoughts and opened up his bag to pull out his Soviets...

Paul had brought:

Soviet 'Forward Detachment' 

HQ: CO in a T-34/85, 2iC and Battalion Komissar infantry teams
8 x Guards T-34/85
Tank Rider Company with 2 platoons and an HMG team
3 x ISU 122
4 x SU 122
6 x Mortars
Spetsnaz platoon with 1 squad. (recce scouts)


We then rolled off for the mission, and came up with "Pincer."

I have only played Pincer once before as a multi player game where the game was virtually over before the Pincer arrived, it was one of the more 'quirky' games we've played !

Pincer plays very much like the classic 'No Retreat' mission; with one Ambush, but with Delayed reserves. This delay is compensated for slightly in the fact that the reserves come on from the sides... so potentially behind the attacker as he is advancing on to your deployed forces...

Paul's Soviet Forward Detachment is an 'Always Attack' force, so that made me the defender...

Of my 7 platoons I would have 3 on with one ambushing and 4 off as delayed reserves. Predicting the objective placement, I knew I'd need infantry defending the frontal objective, and may as well have artillery on the back one. That left the ambush and it had to be the Panthers... So I was looking for open lines of fire for the Panthers and chose the wooded end of the table where the centre was dominated by a large cornfield.

I deployed as below, dismounted infantry in front left wood, just behind and contesting the objective. And nebs on edge of rear central wood.


Two German platoons defend the objectives
I thought long and hard about the infantry. The problem I faced was if Paul advanced and forced me back in the first assault, I'd be pushed back off the objective instantly. But to deploy forward in foxholes, would open me up to the devastation the breakthrough guns of the SU and ISU assault guns have brought on me, as in the past. The 'tandem team' of these beasts with the scouts revealing my gone to ground status has left bloody smears of the grenadiers all over Mother Russia... So I decided to simply stay out of sight, yet still contesting the objective. Anything is going to have to get within 6" of me before they can shoot me, and there was a large empty space through which infantry would have to move, or tanks would have to park themselves to fire.

So that was my plan, hold on and wait for the 'cavalry'....

Paul then deployed his Soviet behemoth... the number of Soviets and their resources always has a perplexing effect on me as I stared down this wall of death poised to surge against my two pitiful looking platoons.

Paul deployed his infantry horde opposite my grenadiers, his assault guns centrally, and the T34s poised to swarm round my flank to the rear objective...

Oh well I thought, at least its going to take his infantry about 4 turns to slog their way up my line, and with a little luck my Panthers may be able to hold out till some extra armoured help arrives with my PzIVs...

Deployment complete

Paul's Soviet Horde.
Of course, I had forgotten one of this Soviet forces special rules - infiltrate! This allows a platoon to make an infiltration move forward, before the start of the game! My only counter to this is that, Paul having made this move, I then get to roll a dice and if I get a 6, then this counts as Paul's first turn and I get to go next! I didn't roll a 6... so Paul's Soviet infantry were up close and it was their turn to advance...

Paul's first turn, he advanced the scouts up into the centre cornfield, the infantry continued their advance into the small farmlet opposite my Grenadiers, with the CO's tank following behind them. His mortars followed these forces up. The assault guns moved up the centre and T34s swung round to the flank of the woods. As all my stuff was out of sight or too far away and Gone To Ground, he had no fire...

Soviet first turn moves
Whilst I mulled over my plan, Paul spotted my army list and what I had written on the top... worthy of a photo he thought! I kinda groaned, looking at the horde fast approaching me...

Could it be???
So without further ado, I had tanks coming at me from all directions and scouts pushing forwards who could push back my ambush if I waited too long to use it. So I revealed the Panthers either side of the small farm building in my side of the battlefield.

The two Panthers on the left took aim on the Soviet CO tank, and got two hits! This forced the CO to join the SU's beside him, so one hit on the CO and one hit on an SU. Both were destroyed! The right side Panther took aim on one of the ISUs, and hit and destroyed it!

So quite an effective ambush, especially destroying the Soviet Commander...

In the meantime the Nebs ranged in on the huge infantry mass but only killed one team.


Panthers ambush

Soviet CO and an SU burn...

And an ISU is sniped as well
The arrival of the Panther ambush, stalled Paul's rapid tank advance. His remaining SUs moved laterally to hide behind a small central wood. The T34s moved into and through the woods to engage the Panthers in a tank duel. The 2 remaining ISUs also came over down the road to face the Panther threat...

At this point their fire only manged to bail out the right side panther. Paul's infantry decided to stay where they were in the farm, as I had also brought into the wood the supporting half tracks of the platoon, which would bring more defensive MG fire if the Soviets risked an assault or advance towards the grenadiers...


The tank duel starts

In my 2nd turn, I knew the harm those big ISUs can do, so I hit them with smoke from the nebs to try and minimise their effectiveness, whilst returned fire at the T34s with the Panthers. The bailed Panther had failed to remount. I think I knocked out a couple of T34s at this point...

This state of affairs continued over the next couple of turns, as I survived against the Soviet tank fire, whilst I continued to smoke ISUs and knock out a T34 per turn, slowly whittling him down. The infantry continued to stare at each other watching this tank duel to their side...

Finally I managed to get reserves, and three PzIVs turned up, moving behind the Soviet firing line and targetting the trailing tank that had previously bogged but freed itself. 3 shots for moving, needing 4's and I miss! The smoke hit the ISUs again but this time I missed the T34s if I recall correctly - a bad round of shooting... The PzIVs did managed to stormtrooper away further behind the Soviet wood. The Soviet T34 managed to crank his turret round and destroyed a panzer!...

Soviets knock out a PzIV

...and this time destroy the bailed out Panther..

Bailed Panther finally taken out by T34s
This turn, more German reserves show up... the flamethrower half tracks and 2nd full GPG. The Flame half tracks were in perfect striking distance, having come on the German left flank, to immediately go to work on the Soviet infantry hiding in the farm.
The GPGs I was in two mind about... I felt like charging against the Soviet infantry with them, but Paul counselled caution, and suggested a safer option would be to move to support the Nebs on rear objective, in case the Soviet tanks break through past the Panthers... so this I did moving them up behind the wood out of sight...
In the shooting phase the flame throwers let loose, with 12 skill checks needing 3's ... vwoosh! The smell of burnt flesh filled the air, as 6 stands of Soviet infantry got cremated...Paul sportingly placed his smoke and flame markers for his picture :-)

Mmmmmm... nice crispy Soviets...
This action now seriously dented the threat posed by the Soviet infantry against the front German objective.

This bold move by the Flame half tracks coaxed out the SU's who had been hidden behind the small middle wood all this time... They moved up and fired on the Flame half tracks but were unsuccessful. The Soviet mortars also tried to hit the half tacks but also were ineffective.

The tank duel continued on the other flank as the PzIVs moved back up to try and kill the lone Soviet T34 but only bailed it...

Next turn the final German reserve showed up... the 3 Recce armoured teams (250/1 and 2 x 250/9 2cm [250/9's proxied by 8Rads]). These, along with the still alive Flame half tracks moved up to fire on the Soviet mortars who had had the temerity to fire on the Reich's glorious flame throwers!

The mortars had been unable to dig in on the road, and had fired last turn, so were vulnerable to MG fire... The Flamethrowers still had their MGs to fire despite now being out of flame fuel, and the recce teams added their own MG fire... 15 MG shots later, and the Mortars were down 5 teams...


Red dots at top show where the nebs and Flame throwers had done their work, and at bottom where mortars used to be...
This shooting was followed up by the recce platoon assaulting the Soviet infantry! This resulted in more dead Soviets for the loss of the 250/1, and the Soviets broke off...

This German boldness was rewarded, by the SUs making up for their poor performance last turn and they destroyed the Flame half tracks. Despite mayhem, death and destruction thus far, the loss of the Flame half tracks was the first VP scored in the game!

Flame halftracks die to Soviet SUs
 The German recce pushed on, and assaulted and finished off the Soviet Mortars,  but this was now rewarded by the SUs turning their attention to the recce and blew these away too, the last one failing morale and fleeing...

German recce has killed the Soviet Mortars but is in turned destroyed by SUs

Meanwhile on the other flank, The PzIVs had finally taken out the lone Soviet T34, and other T34  burning wrecks blazed along the edge of the tree line where the Panthers had methodically been doing their work. The boldness of the PzIVs was to be rewarded by the remaining Soviet armour now turning to finish off this threat to their flank.

It was at about this point that I think Paul's tactic changed ... I think he realised hope of getting an objective was slipping from his grasp, but never one to wave the white flag and throw in the towel, Paul now looked to win by breaking me, and keeping his own forces alive... so the PzIVs could be an easy VP point...


This change in targets by the Soviet tanks, gave the Panthers the perfect opportunity to change their target, and they moved to engage the SUs, with long range shots over the cornfield...

At the same time, sensing a possible victory in the air, I started to look for a way to put the lights out on the Soviets...Their infantry platoon had took a mauling, and could possibly be finished off, and suddenly I spotted the 3 scout teams who had been sitting in the cornfield all this time. I decided to try and flush them out and started moving over the front GPGs, while the GPGs that had been covering the rear obective, advanced to support the front objective, now that the Soviet flanking move seemed to have been stymied.

The Panthers fired and destroyed two SUs! The remaining one failed morale and fled! Finally I score a point.

SUs destroyed by Panthers
The scouts pulled back out the reach of the GPGs, to be chased across and round the cornfield. To counter this threat, the remaining Soviet Armour, having finished the PzIVs, moved over to challenge the German half tracks and infantry. This allowed the Panthers to move into position on the flank of the Soviet armour... The other GPGs doubled timed forward round the left flank farm, and chased down the retreating Soviet infantry who were almost back to their start positions...

The Panthers fired taking out the lone T34 on the road. The GPGs machine gunned the scouts, in the small wood,  to death, then stormtroopered back into the cornfield away from the ISUs.

GPGs surround and kill the scouts
Paul swung the ISUs and remaining T34s round to go after the Panthers but failed to achieve anything...

The Germans retaliated by bailing (or killing?) an ISU and killing a T34 ( I think?) with the Panthers, but more tellingly, chasing down, shooting and then assaulting the fleeing infantry with the full GPG and the half tracks of the second. The Soviet infantry along with the Soviet 2iC, were destroyed.

With the Soviet CO and 2iC dead and 4 platoons destroyed out of 6, the Soviets automatically failed company morale and were defeated!

Final positions...


So the game ended in a 4-3 victory to the Germans.

It has been a long time since I have managed a definite victory, and it certainly brought a smile back to my face, and a sense that the 'mojo' has returned ;-)

Paul continued to be a sporting player to the end including offering snippets of advice here and there. But you certainly have to 'put him to bed' so to speak, because he never gives up, and the fat lady was a long time waiting to sing!

In post game chat, we discussed my boldness and how it cost me a couple of platoons, when really had this been a tournament game, I might have been better off, having used the flame throwers, to just pull everything back and wait it out as Paul at that point wasn't really in a position to attack and claim the objectives. By playing more defensively, I could have pulled out a bigger victory...

But I find it hard to pull back and sit it out, especially using their GPGs , and scenting 'blood in the air', the recce and flamethrowers were hurled forward... to their glory and doom!

A thoroughly enjoyable and exciting game, and very bloody end for the Soviets. As Paul mentioned afterwards just about all his forces were killed or driven off , with only a few tanks remaining! Though the Germans certainly took a hiding too...

And the sad part of history being, the Germans could ill afford such losses, whilst the Soviets could endlessly throw move troops into subsequent battles.

I am busy reading the Forgotten Soldier by Guy Sayer, and that story certainly gelled with this mission and the game play today. Perhaps it had got me 'all inspired!?"

Cracking stuff all round!

Sunday, 24 February 2013

The fairer sex...

My continuing run of losses in this game has caused a little angst on homefront, due to me usually being somewhat sulky or moody afterwards.

This led to my significant other offering such comments as, "its just a game, whats so difficult about it?".
To which my replies were something to the effect of, "Well if you don't think its so hard why don't you try it and see how well you do?"
 To which I got the response "Is that a challenge?"
"Sure why not" said I...
"I do have two degrees you know? If I put my mind to something , I can do it!"
"Fine bring it on..."

So Saturday night resulted in an impromptu game of Flames of War, between me and the Mrs.

The game ended up being a full on family affair initially, as young daughter became my dice roller, and young son becme the wifes dice roller... though this state of affairs didn't last too long once the gameplay grabbed my wife and she wanted to roll her own dice... the kids drifted off to watch movies...

Therefore I present what went down...

Just to make it easy for my wife, Tracey, to get to grips with the game, I set up a 1100pt tank game, and Free for All mission.

Forces were picked from the recent Market Garden release. This would give us each an HQ and 2 combat platoons.

I set the terrain up as a generic western front theatre, with a main road crossing the board, farmstead either side and woods dotted round the periphery.

Tracey took a Guards Armoured, XXX Corp Sherman tank force:
HQ - 2 x Sherman V plus additional Sherman V
1 combat platoon - 2 x Sherman V + 2 x Firefly
1 combat platoon - 3 x Sherman V + 1 Firefly

I took a Schwere PanzerjaegerAbteilung
HQ - 2 x Jagdpanther
1 combat platoon - 1 x Jagdpanther
1 x combat platoon - 4 x StuG G

We rolled the dice and Tracey won that as the attacker and placed her objectives, one in centre of my area and other to my right flank.
I responded spreading mine apart to each of her flanks...

Then we deployed our troops in alternating fashion, as per mission...


Tracey ready for the off after having spent the afternoon perusing rulebook and army lists.
Deployment...

Tracey's deployment, her right flank... 2 HQ tanks in centre area

... and left flank, including one HQ tank

I put one Jagdpanther covering my right flank...

2iC on central objective...

...and StuGs backed up by CiC on my left...
My plan was to snipe any tanks approaching the objectives, whilst I pushed the StuGs and CO round the left...

First Turn...

Tracey advances Shermans to edge of wood with firefly ready to shoot anything that may come round the flank of woods

On her left flank the Shermans advance through the woods is met with an introduction to the bogging test, resulting in two 1's !
In my turn I saw chance to knock out a firefly, so moved up the StuGs for a round of fire...

StuGs ready to nail firefly...

While the CO takes aim on the Brit CO. Tracey hadn't spotted this long range diagonal shot across board and hadn't moved the CO

My right flank tank, moves to cover of wood line for a shot on approaching Shermans, then plans to stormtrooper back out of the way.. The shot misses, and I fail stormtrooper!

The StuGs only manage one bail on the firefly! (daughters dice rolling, grr!), but do manage their stormtrooper to get out of harms way...

British CO is bailed by the jagdpanther Co's shot...( he remained this way for next 4 turns!)

Tracey motivates to get back in the firefly and advances on the StuGs

She also presses forward towards the exposed flank Jagdpanther...

2iC decides to join the action and bogs trying to move out of the wood...

Shermans and firefly fire, 3 shots total; 3 hits - 2 kills one bail. (Son's dice rolling, grr!) StuGs fail morale and are gone! Leaving German CO exposed! I am now down to 3 tanks vs 11 !

The German CO moves up to cover of burning wrecks to fire back... and misses

2iC in centre drifts over to try and help Right flank...

Firefly stays where it is as 2 shermans go for the German CO's flank...Firing only bails him, but he failed to remount next turn...

Large cat stopped play!

Having survived the attentions of the Shermans on my right,  I had dropped back behind wood. Tracey moves up round the other side of wood. Now begins the game of cat and mouse...

One bogged tank passes a skill test on Tracey's left to move out of the wood, then hits the same tree root and bogs again! Last HQ tank is staying on objective, just in case...

The German CO fails to remount

Sherman's advance properly onto German CO's flank this time...

... but he survives their attention.

Meanwhile, Shermans and jagdpanther on flank continue their cat and mouse game...

Jagdpanther moves out for a shot on firefly, and misses, and stormtroopers back. Centre 2ic has failed to hit anything either...

Amazingly German CO survives, remounts and reverses away from firefly  and flanking Shermans, round wood, fires back and kills one Sherman.

Tracey follows up with firefly, whilst other tank goes to hide in woods on right, and 2iC unbogs and moves out of wood behind German CO.


The cat and mouse game ends on German right flank as Firefly and another Shermans get either side of jagdpanther trying to hold objective. The inevitable happens.

And the German CO gets bailed

Last gasp desperation... German CO remounts and heads over for a single long range shot at Shermans on objective and 2iC moves from its centre position to try the same. Both shots miss. Game to Tracey!
Tracey quite stoked, suggested a break for a cup of tea and 15 mins re-think, then "let's play it again" she says. Quite amazed I said OK. "We are after all trying to help you play the game better", she says...

So what did I learn here? Perhaps I was too bold with the StuGs, and leaving only one tank on each objective was not going to be enough to hold back the Sherman tide. Once the StuGs got blown away in one turn I was on a hiding to nothing...

So we played exactly the same game again, only this time I won roll for first turn...

Tracey stoked after first game win, deploys again.

Surveys her left flank and ponders her tactics

This time I deploy defensively with a plan to sit on objectives, and just fire at whatever approaches. Stugs on right flank...

...jagdpanthers in centre.

StuGs advance through woods to edge of treeline to fire...

And blast the firefly!

Tracey decides to move round other side of woods to engage StuGs... but fails to do any damage

Right flank Shermans move through centre to cover of small wood avoiding LOS from Jagdpanthers

StuGs fire blasts another firefly, and bails the CO.

Jagpanther fire knocks out another tank, and platoon fails morale, leaving a bailed CO and an HQ Sherman behind the wood.

Firefly at top sneaks to edge of wood for a shot at jagdpanthers but misses, and 2iC tank moves up behind farmhouse, trying to get over to help deteriorating left flank.

Return Jagdpanther fire kills the last firefly

CO and HQ Sherman move round wood away from jadgpanthers and bail a StuG

StuGs return fire killing HQ tank and bailing CO

CO remounts and 2iC arrives behind wood

StuG is bailed again

Remaining Shermans realise they can't do anything to jagdpanthers and try to relocate to hurt StuGs

2iC and CO trying to hit Stugs

return fire kills 2iC tank and bails CO

Jagdpanther decides now is time to make a break for the exposed objective...

So Sherman platoon is forced to head back to cover that.

In doing so get caught in crossfire from StuGs and Jagpanthers getting 2 bailed.

Brit CO destroyed

Another Sherman dies

Jagpanther gets on objective and can't be hurt by Sherman from front

Shermans move up to contest objective

StuGs break cover for other objective but two bog leaving woods

"You're mine" says jagdpanther but only bails them!

They both remount, move to flank and blow away jagdpanther!

But nothing can stop StuGs claiming other objective!
Game to Scott, yipee!

So again lessons learned; in this situation a defensive playing style better suits the Germans, and forces the enemy to come to me. It could have turned into a long range duel, with who could roll a 6 to hit, and with the Shermans Semi-Indirect fire tipping the balance, but early hits from the Germans with some lucky rolls, followed by Gun Tank rule successful rolls saw the fireflys go down quickly. After that Tracey was on the back foot, with no way to get to a flank on the German tanks... She continued gamely, but it was just a matter of time.

So two great games, which she thoroughly enjoyed and wants to play more! Having read the army lists again she has discovered she can add air support, and wants to try that in our next game , so I need to get that typhoon finished off!

She also wants to watch my games with the guys to learn from these experiences and wants to try her hand playing against them too! Whatever is the world coming too! ;-)