Showing posts with label Hold the Line. Show all posts

Sunday, 5 May 2013

A Time to Die... how long should a game take?

I have enjoyed two games of FoW this week, which could not have been more different...

The first against Brett, was the tank on tank battle featured in the previous blog post, and the next game the following night against Paul; the 3rd game in our Breville Gap campaign, the Germans having another go at breaking through in a Hold the Line after their 'diversionary attack' in the previous game.

 Normally our 'policy' here at 'KFoW', is that the victor writes the battle report... but that last game against Paul became quite a serious (though still good natured) affair, and I think I gave Paul enough concern, and thus caused him to concentrate on the game a little more than normal, that he stopped taking pictures part way in...

It was a seriously gutsy game, death and mayhem on each side, and I eventually broke through and had a toe hold on the objective with other troops poised to follow up, and with Paul's remaining forces being quite battered and getting to the point they were hanging on as best they could, but at the point we called it, Paul was still contesting the objective, and thus the game was a 4-3 to Paul.

The reason we called it was that the game started at about 7pm and we called 'time' at 11.30pm... four and half hours later... Poor Paul is an early riser and he was just about asleep by the end of the game, whilst me being a bit more of a night owl, was still happy playing on...

 I will admit freely, I am not the best player in the world (but hopefully improving), and it takes me quite a while to ponder my tactics for the game and in turn, turn to turn as the game progresses...

With the tank battle previously, there is little to really consider; no artillery, no decision between bombard or smoke, no worrying about moving infantry around, being gone to ground or dug in, or whatever... it just about boils down to, can I roll a 6 to hit, and if so, can I follow it up with a successful FP test... hence the game was probably over in 60-90 mins or there abouts...

But with infantry on infantry, in a defensive battle, there is far more going on...

The game for the defender, once they have cunningly constructed their defense, becomes a game of mostly keeping their heads down gone to ground and waiting to unleash their ambush at the most opportune time, and hope they get reserves in time...

The game for a the attacker is more complex, having had a brief chance to study the defenders defense he has to come up with a plan of attack; which objective to strike for, how to go about it, how to mitigate any ambush, which artillery to use against which targets, and to try and fire smoke to conceal, or a bombardment to kill... and then how best to set up a possible game winning assault such that I can capture an objective and be in such a position to hold on to it against any likely counter attack...

There's an awful lot going on in such a game... so how long is fair amount of time to resolve such a game?

This question crops up in the forums from time to time, especially concerning tournament play, where time management is crucial for the conduct of the tournament in a timely manner. Most tournaments appear to allow 2.5hrs  for each game. And yet it can cause concerns about deliberate slow play, as several missions go in the defenders favour if the attacker fails to grab an objective, or break the defender...

Note that I am not saying Paul plays slowly, far from it, it would be me the attacker taking a while to ponder my tactics, I can't help it...

Here's a quick look at the issues from that last game. I am not going to do a full ARR, but give you a few of the points of the game...

So the Game is Hold the Line, with Brit Paras defending against an attack by German Grenadiers.
Objectives go down in typical fashion, Paul places his at the back, I place mine more or less diagonally opposite as near to my front as possible...

The Brits deploy two Para platoons and an Engineer platoon, spanning the front of the board with 3 barbed wire sections down covering approach to front objective. This is tough enough to get through, But Paul also has 4 x HMG and 4 x 6pdrs in ambush. One can shred an infantry platoon, the other can wreck a tank platoon, in one round of fire... Not nice...

The rest of Pauls force is in delayed reserve; artillery, 2 more 6pdrs, trained infantry, recce jeeps with MGs, and mortars...

I am attacking this with 2 x grenadier platoons, 1 pioneer platoon with flamethrowers, 4 x HMG, 4 x Mortars, 4 x 10⁵ howitzers, 4 x StuHs, 1 x Scout platoon.

My plan is relatively straight forward - Get scouts up as far as possible early to push back any ambush and then start lifting GTG on the Paras. GTG Paras in foxholes are 6s to hit at short range and impossible at long range... Lifting GTG can make all the difference.

Also, my infantry start 16" back from the Defenders zone, so its going to take me 3 turns to get there, unless I am lucky with some storm trooper moves, then I have to get to the wire, and then start the next turn NOT pinned down with my pioneers to Gap it to allow my troops through, then I still have to get into suitable position to assault...

All the while I am conscious of Pauls ambush and where they could strike from, and thus where do I need to try and drop smoke to cover my approach, but I also want to kills some Paras with my Howitzers...


Here are the general deployment pics...


My pioneers are still a WIP, hence the card bases...


Now, things go wrong for me in first turn, I push my scouts up as far as possible, getting a good position to view Pauls platoons from cover and also forcing back an ambush from the area I intend to assault.
Paul realises he has nothing to lose, as he'll be lifted GTG next turn anyway, fires everything he can at the scouts, he kills two teams, despite needing 6s to hit, but I have 2 left so I am still OK, just. Then he remembers one last possible shot, from an observer team; one shot on a 6, gets it and I fail the save, typical... scouts fail morale and are gone. F*ck!

So now my chances to lift GTG are gone and I cant push back any ambush... And Paul now settles back into his foxholes, gone to ground...

Red dots mark the dead scouts

This forces my approach to be far more cautious...

So I eventually get into position to shift the wire, but then Paul ambushes with his HMGs killing some pioneers and Pinning the platoon... so I cant shift the wire next turn and must wait for another turn and on it goes... All during this time I am slowly doing some damage with the howitzers which luckily ranged in on first throw of game and the StuHs are picking off the odd team thanks to their breakthrough guns...Opposing sniper teams are also enjoying some activity...

Eventually I am through the wire, but by which time Paul has decided to withdraw slightly, not wishing get all crispy from my flamethrowers. So I manage to get to and take the building adjacent the objective, but Paul still has a few teams left from a platoon, dug in near it contesting. I can eventually kill them once I reposition the StuHs but that's at least another 2 turns...

So we call the game, Paul has took a battering, 3 platoons down, CO - rang away with engineers, 2ic just been killed, two para platoons badly mauled, the 6drs have had two guns knocked out (one to the pioneers goliath), only his mortars left to come on. My only concern now really is if his artillery ranges in on me on the objective and starts to do some damage before I can remove his last contesting teams...

So all of that took 4.5hrs. We did have a few rules queries along the way which always takes a few minutes to resolve too, looking stuff up.. And it could go on longer to get to conclusion... so when do you stop?

If this game had had a time limit from the start, then I may as well have packed up and gone home once the scouts died on turn one - I'd certainly have scored more brownie points with the Mrs for an early Friday finish and get to have a glass of vino with her...  but I was conscious of throwing away the second game early, and not playing on for VPs for the campaign... hence my determination here...

As it happens, Paul is now 14 points to 7 up in the campign after 3 games, so I have no chance of getting back into it... So I'll declare Paul the winner.

We have planned another Hold the Line for next game; 3rd times a charm(!?) to see if its possible to crack this nut as the attacker, I can be a determined stubborn bugger sometimes... see if I can keep the scouts alive this time and what difference it makes, maybe consider other ways to play the mission...

So what do you think; a defensive battle between infantry companies, each knowing beforehand the opponent and mission thus the best chance to pick the best troops for the job. And a game involving field fortifications - How Long Should The Game Last to get to a fair conclusion?


Thursday, 2 May 2013

Firestorm Lorraine - Turn one, Game two - Hold the Line

A couple of weeks back, Brett and I decided to make more of our series of one off games, now that we both have a degree of competence with the rules and general tactics of the game, so some kind of campaign of linked games seemed in order.

 Some time ago Brett picked up the Blood, Guts and Glory book, for his American Forces, and was quite thrilled with the prospect of Tank battles in NW Europe.

I must confess at the time this came out, and I checked out the German lists, suddenly finding my Wehrmacht was getting reduced to Reluctant Trained as the Yanks improved to Confident Vets, did not fill me with much enthusiasm...

However, having found a free online download of a smaller scale Firestorm setting entitled Lorraine from the BF website, it seemed too good to pass up the chance to learn the Firestorm campaign setting. We also have the Firestorm Market Garden and Bagration sets but haven't figured out how to use them yet, so this seemed the perfect way to learn...

The first game we played saw, Brett start the campaign, attacking my forces in Luxemburg (A3) from Mairy (B3). I chose a themed Panzerkompanie from BGG, which Brett had to attack with his Armoured Rifles, and we rolled up Counter-Attack. Brett had a bunch of big AT guns as his Firestorm troops for the mission which he put down on a ridge overlooking my position, which kept me pinned down behind it. We cocked up a bit giving the guns the benefit of being in cover for being dug in, not realizing they were too big to get this cover bonus... I managed to keep my force fairly intact, knocking out a couple of these guns with moving and storm troopering back out of harms way... but Brett advance across a broad front, and manage to get his 'teleporting' M10 tank destroyers behind me by about turn 4 or 5 and in one round of coordinated activity wrecked my force which being reluctant failed a bunch of morale rolls and quit the field giving Brett a 6-1 win and Luxemburg!

Thankfully Brett failed his campaign roll to destroy my Firestorm tanks (3 x PzIV/70s). We then rolled of for initiative for the next battle, which I won making me the attacker in the next game.

So on with game two of Turn One...

As the German player I am only allowed to attack from a location that has Firestorm Panzer troops. This limits my options some what, but allowed me the chance to counter attack round Luxemburg, rather than going for it directly, with the chance of cutting it off, so that's what I chose to do...attacking from A4 to B3 Mairy

I stuck with the same Panzerkompanie from BGG, which in the first Turn sequence of the game gives you 1250pts.

I took:
HQ - 2 x Panther G
3 x Panther G
4 x PzIV J
3 x StuG G
1 x GPG 'scout platoon'; 7 x P'faust/MG teams and 5 x 251/1D half tracks

Added to this force I had the Firestorm Panzers; 3 x PzIV/70's (proxied in game by jagdpanzers).

Brett took (IIRC):
HQ - 2 x Sherman 76's
2 x Shermans + 2 x Sherman 76's
3 x Shermans + 1 x Sherman 105
Tank Destroyer 'teleporters'; Security section plus 2 x M10's

Added to his force he had a Firestorm Infantry Platoon of 10 teams plus 1 x bazooka


 I set the terrain up before the game, representing (hopefully) the French countryside of the Lorraine area...

And we rolled up a mission; Hold the Line.

As soon as this happened, I felt doomed - I have played this recently against Paul in our Breville campaign and know only too well, whilst the defender suffers delayed reserves, he benefits from 2 ambushes. So Bretts 4 platoon tank force would mean, 2 platoons off and 2 platoons on, both ambushing! Sure enough that's what Brett did, having chosen the end to defend, and us placing objectives.

Brett predictably placed one objective centre rear of his position and I placed mine as near as possible in the open to my right hoping my tanks could get a quick clear run at it.

So the only troops on the table for Brett were his HQ tanks, one each tucked behind the left and right flank woods in below pic.

I had opted for a rush down the road with my half tracks, knowing full well they would get hammered, but this would sacrificially reveal Bretts ambush, hopefully allowing my following tanks something to do about it. I thought about AtTheDoubling the half tracks straight onto the objective, but it would only have made their demises all the more easy and even if they survived they wouldnt be able to contest the objective for a further turn.

The half tracks would be supported by the majority of the tank force.
I did however decide to send the StuGs on a long run round the left flank, thus threatening the rear of Bretts CO tank, and a threat on the rear objective. I also chose in the end to ATD them (this would be a tempting target to attract Bretts other ambush, and be as far from the front objective as possible...)

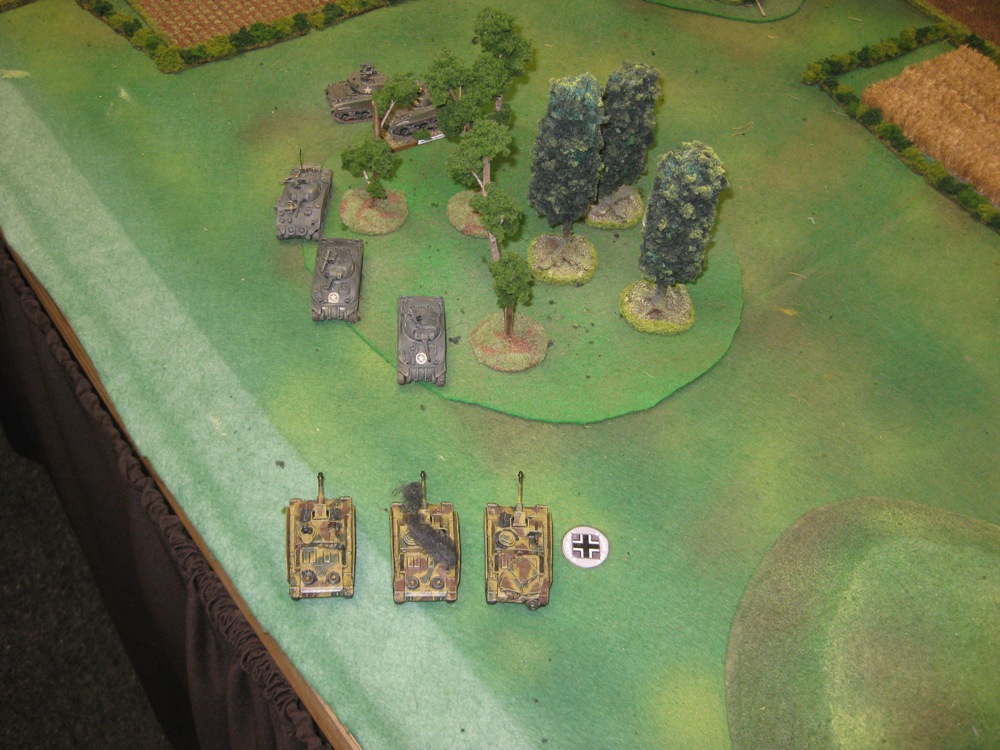
So, my deployment as below, Bretts tanks virtually hidden from view behind the woods...


...and view again from the other end...


Then I remembered to deploy my HQ Panthers behind the main central thrust following the half tracks...

The FHH Panzerkompanie, is horribly one dimensional - all armour - no real recce to mitigate ambushes. The GPGs are 'scouts' in name only... Nor do I get any artillery which could offer me the concealment of smoke,... its just lots of guns, that are easy to hit, and once hit and taking damage will quickly quit the field due to their poor morale rating. The only thing to keep me in it, is the high front armour of the Panthers and PzIV/70s...


So off we went 'to the races', with the GPG roaring off down the road, singing 'Gott mit uns' as he was going to have to be! The panzers followed up behind, trying to get positions to fire back at the likely place Brett would pop his ambush...


... with the StuGs heading off down the other flank, trying to draw more attention... I have no targets in the first turn, and stormtrooper at little closer with half tracks and PzIVs...


Bretts tankers cant believe their luck, seeing a trio of StuGs advancing having thrown caution to the wind... Brett lines up 3 tanks with 12 shots at the ATDing StuGs..., with the 105 looking at the half tracks the other way...


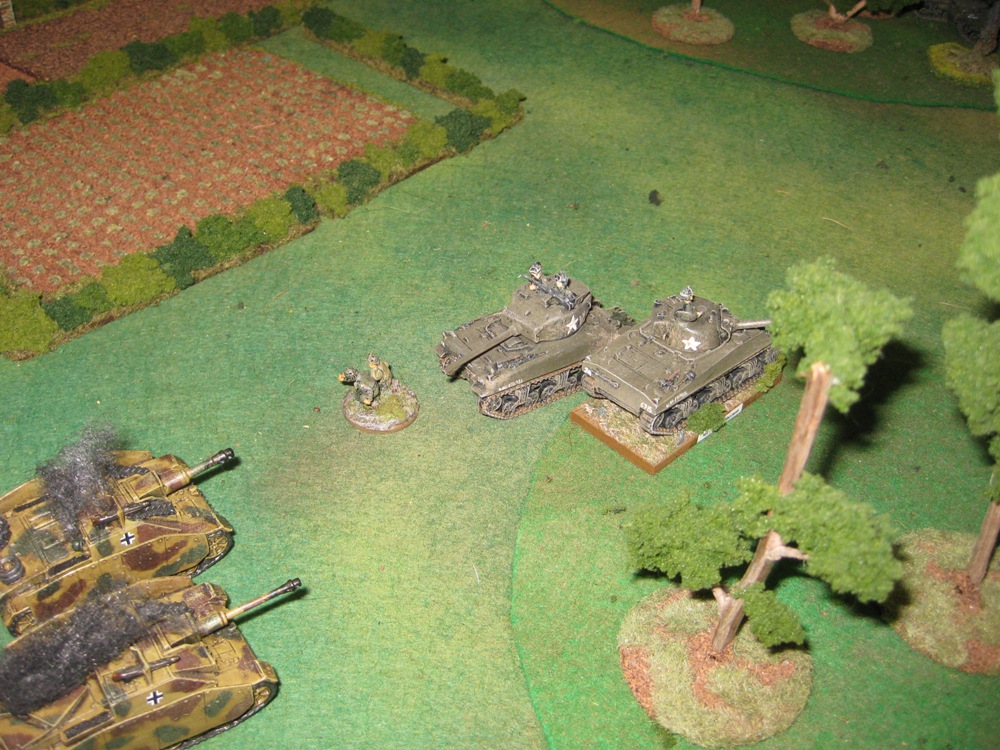
In the centre wood, 4 more Shermans train their barrels on the 'do or die' armoured infantry... and can also see the leading PzIVs coming round the farm house...


The Shermans let rip destroying all five half tracks, but 4 of the 7 teams inside survive, leaping from the flaming wrecks ... luckily meaning they are not required to take a platoon moral check...


Two of the PzIVs are also hit multiple times, but are only bailed, but sadly taking multiple bail results each, are forced to take morale checks and being reluctant promptly quit the field leaving yellow 'coward' markers to show their last known positions... However the remaining tanks do not require a morale check, the platoon being at 50% strength...


The StuGs receive the incoming 12 shots hitting on 3s, yet amazingly only suffer one destroyed and one bailed! Which doesn't amount to a morale check...


I have survived the ambush, and amazingly have a chance to continue! Really I should have been blown away in turn one, game over with three platoons out of 5 gone and a pathetic chance of needing a 5 to stay on the table... But sometimes thems the breaks, so press on ...

German turn 2, the bailed StuG remounts! And the two press on to threaten the rear of the COs Sherman...


The five Panthers look for payback against the central Sherman platoon; 10 shots needing 6's, can I get lucky?...


While the remaining 2 PzIVz's and '70's go after the Sherman 2iC...


The Panthers score 3 hits, destroying 2 Shermans and bailing a third... the platoon promptly rolls a 1 for platoon morale and quits the field, evidenced by the fleeing tank crew down the road...


The StuGs score two hits on the Sherman CO, who promptly decides to join the adjacent Sherman platoon and allocates hits there, which destroy 2 Shermans...


But the Sherman 2iC survives, all shots missing, curses! But still, that's really made it game on for the Germans!


Now Brett has some work to do! The 2iC returns fire at the remaining PzIVs destroying one and bailing the second, who fails morale and quits the field...


On the flank, Brett manages to get a Sherman out of the woods and onto the flank of the StuGs and the CO joins in the shooting... Darn stabilizers on the moving Sherman still gives him 2 shots, added to the 2 from the CO spell the end of the StuGs. Still they achieved more than I expected... and tied up a platoon on the wrong side of the board for a couple of turns...


Back to the Germans, the Panthers move up through the cornfield to try and take out the Sherman CO... The German infantry have still failed to motivate but dig in and stay gone to ground...


The 70's get into position to kill the Sherman 2iC tank...


This time up he goes in flames, and we're sitting on the objective, with nothing in range to get anywhere near to contest. The 70s fail their stormtrooper move so are left with their arse's literally hanging out, but I cant do much about that and there's little that can affect them...


The Sherman CO is only bailed... who scampers from his tank...


Bretts turn three and he rolls one dice for reserves needing a 5 and wouldn't he darn well get some! Up come the 2 M10s from the tank destroyer platoon. No stabilizers, gives them 2 shots at range and cover for slope of the hill at the rear of the 70's, needing 5's... Brett rolls 'box cars' followed by two successful FP tests and 2 of the 70's brew up! I need a 5 for platoon morale to stay in it, and get a 5!


The Shermans who had moved over from the other flank cant hurt the front armour of the panthers and miss the remaining 70.

In the Germans return turn, the Panthers in the cornfield knock out the 105 Sherman, and the 70 moves to the cover of the burning wrecked 70's, which also gets him contesting the objective, and aims at the M10s, as do the 2 HQ panthers.


The cornfield panthers destroy the Sherman 105...


Whilst one of the M10s is knocked out...


Bretts turn 4 sees his last reserve arrive, in the nick of time? The infantry Truscott trot desperately toward the German front objective but are still too far from it...


Brett has to break me this turn with his shooting or its all over... the M10 returns fire at the 70 but fails to destroy it, one shot hitting but bouncing off its front armour...


Brett moves the remaining Shermans from the flank to have a shot at the flank of the panthers. I had been unable to pass stormtrooper with them last turn to avoid such a possibility, but thankfully only bail one of the panthers in the cornfield!


And that is it, Brett has failed to break my force, and I start the next turn sitting on the front objective, claiming a 4-3 win! Who'd have thought it!? Games of dice eh?!


So that means I capture Mairy, and am one sector away from cutting off Luxemburg.

We both rolled to see if we destroyed the others Firestorm troops, needing 6s and both failed so our forces are still intact.

We also rolled to see who would get initiative for the next battle, with Brett winning the dice roll, so he will attack somewhere next game...

More next time, we hope to have Game 3 of Turn 1, next Thursday...