Showing posts with label Firestorm Lorraine. Show all posts

Thursday, 23 May 2013

Firestorm Lorraine - Turn One, Game Four - Cauldron in Belgium

Last night saw Brett and I meet up for our next Firestorm Lorraine campaign game.

In the end I had decided to attack into A2 (Belgium). This sector only contained one unit of American Infantry as Firestorm troops, and if my attack was successful, I would gain a sector worth 100pts to me and cut off Luxembourg from supply.

I got to set up the terrain before the battle (home field advantage and all that!), and after coming across an interesting looking map on the FoW website, decided to copy that, which comprised a village/town in one corner, with roads radiating out in several direction and wooded areas between the roads.

I anticipated Brett bringing an infantry company, and this would give him plenty of places to hide his infantry and set up his defense, but would hopefully give me some cover too, on my approach to any objectives...

Forces are still 1250pts, plus Firestorm troops.

I had chosen to attack with my BGG Panzerkompanie again, though with a subtle tweak to last time.

I fielded the following:

HQ (Reluctant Trained) 2 x Panther
3 x Panther
4 x PzIV J
Aufklarungs; 7 x MG/P'Faust & 7 x 251/1 Half Tracks
Plus... 3 x PzIV/70V as my Firestorm troops

 Brett had brought his Tank Company, not what I was expecting! IIRC...

HQ (Confident Veterans) 2 x Sherman 76
3 x Shermans
2 x Shermans & 2 x Sherman 76
Armoured Mortars
Armoured AAA
Artillery
Infantry platoon with 1 Bazooka - Firestorm troops
Priority p47s - Firestorm troops

We rolled off mission and got Cauldron, one of the most random missions in the book! A defensive style battle, in which the defender gets an Immediate Ambush, though this is more like a delayed deployment, but since the defender gets first turn, could be quite effective.
The attacker has his forces deploy randomly by table quarter.
Both sides get reserves, with the defenders being delayed, and the attackers immediate but random.

Another mind bender of game seemed likely...

Brett picked his deployment area, and chose the 'open' side of the table, rather than the congested town side, and I placed objective markers in the opposite corners of his zone, hoping to spread Bretts defence as much as possible. Brett chose to deploy his infantry on one objective at the rear and tanks on the forward one with Mortars, AAA and Artillery as reserves...

I decided I would have to deal with Bretts armour first, if I could, before trying to deal with his infantry and other assets with my armoured infantry. So I chose to deploy the Panthers and 70s and obviously the HQ Panthers, and leave the P4s and infantry in reserves until some of the threat of Brett tanks had hopefully been reduced... The Panthers and 70's had the best front armour and biggest guns to hopefully deal with and withstand the attentions of the Shermans, and the P4s would act in their traditional infantry support role... But I still didn't know where my deployed troops would deploy... as it happened I rolled a 2 for each of the tank platoons so they both arrived diagonally in front of the front objective, facing off against Bretts armour...

Since Brett would get first turn, and had an immediate ambush of 4 Shermans to put down, I chose to hide the tanks behind a couple of clumps of woods, so Brett would need to move out to hit me, and I'd be close to terrain to hopefully mitigate his planes a little... I'd then either be able to move, shoot and hopefully stormtrooper back out of the way, or be left as is but firing at full ROF next turn...

The problem I faced was, being trained I am hit on 3s, and Yank Shermans have stabilisers which means they can fire at full effect ROF on the move though at +1 to hit. Still that means each Yank tank gets two shots on the move and hitting me on a 4... So with 9 Yank tanks and priority planes available, facing off against 8 German tanks, it was going to get interesting quickly...

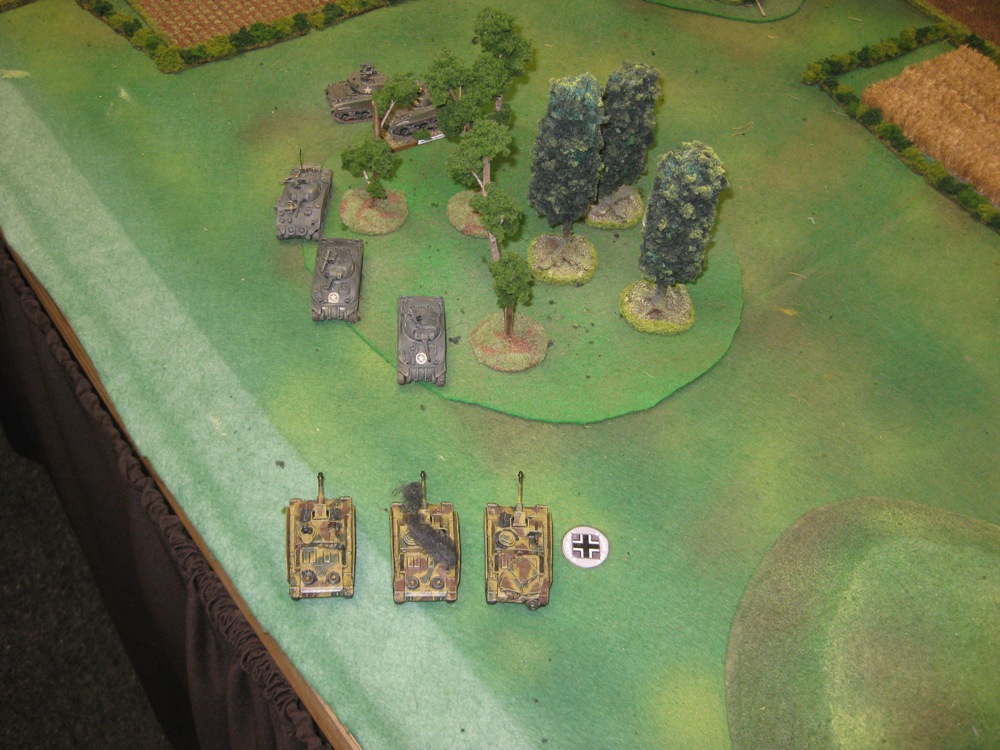
Initial deployment...

Tanks ready to face off, 70s just below centre bottom woods and HQ Panthers to right
It was going to get interesting in a heartbeat...

and reverse view from infantry side

A rather nice Mustang proxying as a P47, will it prove decisive in this tank scrap?
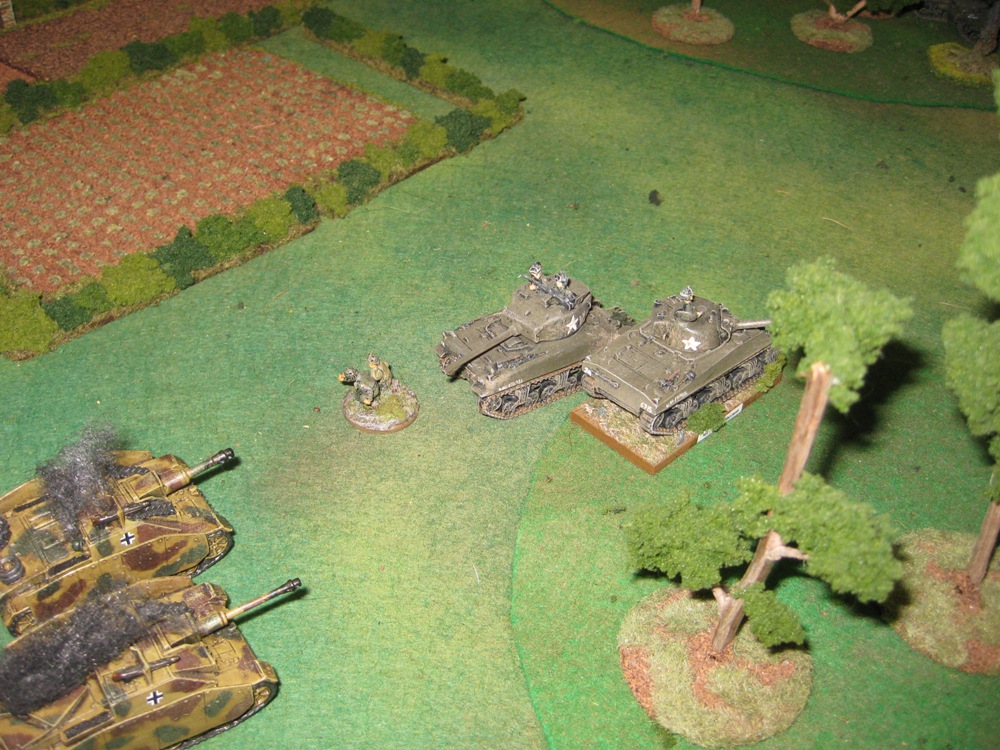
Never one to hold back, Brett moves out... with one platoon backed up by the HQ tanks, leaving one platoon covering the wooded objective. Planes arrive sniffing out the Panther platoon... Brett also moves out his artillery observer in his jeep , looking to find a vantage point in the church steeple.

Brett lines up 4 side shots on my HQ panthers, but only scores one hit, which I then have the gaul to save! His HQ 76s let rip at the Panther platoon, destroying one and bailed a second. Thankfully the planes fail to range in...

Yanks roll out
In return, Germans get their P4s as reserve but they annoyingly arrive on the other side of the board and have to drive past or through the urban area to get to the Yank infantry. However they do spot a lone Yank jeep  driving up to the church, and rip it apart with their MG fire, killing the occupants...

The bailed panther fails to remount, but remaining panther, the 70s and HQ Panthers converge, and target the HQ Shermans, but Brett  joins them to the nearby Sherman platoon and allocates hits there. I fail the gun-tank rule, and thus destroy 2 tanks from the platoon. They fail morale and Brett decides to let the last tank go, rather than risk losing his CO too...

German return fire...
Sorry no more pics, things got a little intense... a swirling two turns later saw  Brett move out his Shermans from the wood, though one bogged, to enter the fight. The remaining Panther was knocked out and the bailed tank failed morale and fled. The p47s ranged in but failed to hit any targets... More fire on the 70s was ineffective, only bailing one. Return fire from the 70's and HQ Panthers knocked out two tanks from second Sherman platoon, and with one still bogged in woods, forced a morale check and they failed and fled. The Sherman 2iC was also knocked out.
This now forced a Company Morale check at the start of Bretts turn 3, which he passed. The Sherman CO was now on his own and moved out to try to get out of harms way and let te planes freely operate. He knocked out a 70, but the planes failed to range in.
The P4s moved up on the infantry and an Aufklarung arrived from reserve behind the P4s so again had a long route through the town so decided to try and make up time doubling down the road...
The main German tanks massed as much fire as they could on the lone Sherman CO and knocked him out. The 2iC panther had also moved up on the now exposed front objective...

Top of Bretts turn 4 and with two platoons destroyed and only his infantry on the table, and with no HQ elements alive, he auto-failed Company Morale, yielding a 5-2 win to the Germans! However it had taken a moment to realise this, and Brett had just rolled to get his reserves, and succeeded... his Armoured AAA was poised to turn up behind the doubling half tracks, which would have no doubt proved painful for the Germans. But the battle ended before they could enter the fray...

Final positions...

The German armour has won the tank battle on the flank and contest the objective.

I have to say on balance I think this game should have gone to Brett, but his dice let him down at times, and the few return shots I got back each time, steadily reaped rewards... for once I don't think I failed a Firepower test all game...

The P4s were pressuring the Yank infantry (now departed) with Aufklarungs ready to roll up...
A few post game issues to clear up. I still had to roll to see what happened to Bretts Firestorm troops from the last game... The dice result showing them as 'destroyed' and thus going back into the reserve pool of Firestorm troops. A similar roll was needed after this game and that too saw Bretts Firestorm troops destroyed. It wasn't a good night in the end for Brett...

[We still need to figure out at which point these reserve Firestorm troops get redeployed in the 'Strategic Phase' - is it after each 'Game', or at the start of each 'Turn' - if anyone can help us here please advise in comments below - Thanks!]

So this sees A2 Belgium captured, and in the hands of the Germans, scoring 100Vps if I can still hold on to it at end of campaign, and I have cut off Luxembourg, forcing an out of supply issue to Bretts troops there if I attack.

A final post game dice off showed Brett will be the attacker in the next game, where he can choose which sector to attack... it aint over till the fat lady sings!

Thursday, 16 May 2013

Firestorm Lorraine - Turn One, Game Three - CounterAttack

Continuing our Firestorm Campaign, Brett and I pressed on with our third game...

Brett had won the initiative after the last game and would become the attacker... and chose to attack with his forces to A4 from A3 Luxembourg that he had previously captured. This would mean an attack across the Moselle River, which would mean some bonus field fortifications for the German defenders...

Brett chose to attack with an American Armoured Rifle company (Confident Trained), and I chose to defend with PanzerGrenadiers (Reluctant Trained).

Brett had some Firestorm troops; heavy artillery battery (proxied by Long toms) and AirSupport - Priority. As Brett has Air support we rolled on the weather effect chart, getting a 6 meaning clear skies, curses!

I also had some Firestorm troops - an infantry platoon of variable quality - I rolled a 5 which meant they were Confident Veterans.

Knowing before hand we were playing across the River, I set to making another bridge for my set up 2 days before the game and managed to have it done in time, giving me a modern style bridge with girders newly completed, and a rustic stone bridge and a ford to cross the river satisfying the 3 crossing points required...

On Brett's arrival we rolled the mission, getting Counter Attack, put the river down the middle nominally through no mans land and quickly placed the surrounding terrain. The small hills were classed as "Rises", so block LOS as any other high ground , but classed as Cross Country for movement.

Forces are 1250pts, plus Firestorm troops.

Brett had brought (IIRC...)
HQ- 2 x Rifle teams
2 Armoured Rifle platoons with half tracks
Heavy artillery 155mm (proxied by Long Toms) [FS]
Medium artillery 105mm (proxied by Romulan cloaked stealth bases!)
Tank destroyer platoon; Security section, plus 2 teleporting M10s
Recce platoon with jeeps and armoured cars
Half track Mortar platoon
Half track HMG platoon
Priority Air [FS]
... I think that was it but I get a bit confused looking over all Bretts Yanks, he seems to deploy a veritable parking lot of armour, and its all festooned with those darn 50cals...

I had:
HQ -  2 x SMG 'faust
2 full PanzerGrens with 'faust
1 full PanzerGrens with 'faust (Con vet) [FS]
1 full Pioneers with supply wagon, and 3 flamethrowers
1 x Heavy platoon - 4 x HMG & 2 x 8cm mortars
4 x 2cm AAA (proxied by static launchers)
3 x PaK40
4 x 12cm heavy mortars
4 x PzIV J
2 x Marder IIIM

I placed the 3 trench lines I had covering the left and centre bridges, gapped by the wood, and put an HMG Nest covering these two approaches. I deployed 3 barbed wire sections thanks to the pioneers, covering my side of the three river crossing points...
I then deployed pioneers in the trench lines, backed up by the AAA, Mortars and heavy platoon, and Pak40s in ambush... The heavy platoon was tasked with trying to get to the second exposed objective before it could be claimed by the yanks... if they could get into position with their 4 HMGs they may be able to chuck out enough def fire to throw the Yanks back into the river...

I felt very thin on the ground...I had two mobile platoons to come on, and three infantry platoons who would have to foot slog all the way to the objectives from the opposite table corner to my deployment area... Thank the Gods I had the defences and barbed wire... but that would also impede my own reserves helping me!

So the game gets under way, Brett making a recce move, and then pushing up with one armoured rifles to the modern bridge to attempt a river crossing here with half track 50cal support from the bridge, backed up by mortars firing direct smoke... The 2nd armoured rifles raced (ATDing) for the other exposed objective looking to ford  a quick crossing to claim the exposed objective...

 This tempting target would also attract my pak40 ambush, which would then leave his main assault unmolested...

Smoke and fire covers the German front line to pin and cover the HMG nest and pioneers overlooking the modern bridge.... The recce zoom out looking to make a break for the far ford crossing, only to realise their wheeled vehicles cannot cross the barbed wire at all! The 2nd rifles reach the mid river bank at breakneck speed...


Smoke covers the German lines

Brett even had some dingies for the water crossing - how cool is that!?...

Dingies at the ready for the crossing

Brett's first round of artillery fire , HMGs and planes also manage to pin the pioneers, mortars and AAA, though causes little actually damage other than a 12cm mortar and a AAA gun...

Can the Germans hold on? Heavy platoon poised for a dash to far objective.

The Germans unleash their Pak ambush, (having got no reserves in the first turn),  and fail to unpin everything, reluctant you know?

The pak40s let rip but only destroy 2 half tracks and killing a few teams... from the centre rifle platoon...

The rest of the pioneers and a pak40, shoot up the HMG platoon destroying a half track and killing all the HMG teams on the opposite riverbank...

Paks Ambush

We remember the red dots, dead mortar and AAA gun...

Initial German casualties and pinned platoons

... and dead HMG platoon across the river...

a little bit of payback to the Yank HMGs

Brett has made it across the river and reached the near bank but still faces the HMG nest and pioneers in trenches... The planes swoop in also and murder the heavy platoon trying to get to the 2nd objective... leaving it undefended...

Yanks force a crossing, half tracks with 50cals supporting dingies across the river

The German panzers arrive and are faced with a dilemma... destroy the tank destroyer security section thus forcing their ambush, or see to the remaining infantry looking to force a crossing on the exposed objective... as much as I wanted to kill the potential teleporting M10 threat, the poised infantry were the most dangerous threat and one I could kill as they weren't dug in... a blaze of tank MG fire ripped into the Yanks on the river bank killing all but 2 teams who broke and fled! This stopped the attack on this flank, with only 2 M10s (yet to be revealed) able to cross the barbed wire. I felt I was sacrificing my Panzers to the M10s to do this though... However I got lucky and passed a stormtrooper test to get most of my panzers back behind the flank woods... though one bogged entering the woods...

 Brett then used his recce command team to call in heavy artillery on the panzers, destroying one and bailing another.... and pushed up an armoured car for a flank shot on the panzers in the wood, but missed...

The Germans got more reserves, getting the Marders and ConVet infantry... The infantry moved to assault the armoured car in the woods, the Marders moved to shoot up the tank destroyer security section as the remaining panzers moved out from behind the wood to do the same... on other flank, some teams unpinned eventually allowing the AAA to move closer to defend the objective, the mortars were out of it, never managing to unpin after the first hit artillery hit. but the pioneers were able to push over to the reinforce against the the main Yank thrust... the Paks had previously been knocked out by direct fire from medium artillery battery and other weight of massed fire from the Yanks on my left... I felt I was hanging on by my finger nails here but thankfully the HMG nest still had not been knocked out but continually pinned and smoked turn after turn...

The panzers and Marders combined to kill the security section and the infantry assaulted and killed the armoured car in the woods... as below pic... red dots where the Yanks were mown down by the panzers MG fire...

The other flank hots up, the security section is destroyed...

Brett's turn 5 and time is running out on the game, we've just about played 3 hours and its near 10pm and a work day tomorrow... Brett goes for it with infantry, its a do or die assault time...

Its do or die time for the Yanks, the assault is set up, but the HMG nest isn't pinned

The M10s pop up and wreck a Marder...  More Heavy artillery is called in on the panzers but they manage to only suffer a bail... The planes are shot down again, causing zero damage...

...Even with security section destroyed I can't get close enough to stop the M10s teleporting in...

Brett goes for the assault but this time has failed to pin the HMG nest though has smoked it... but there is enough defensive fire to force back Brett's assault from the HMG nest and pioneers in the trench line to throw back Brett's assault, and at this point he calls it...

As the defender in this mission I auto-win if the attacker fails to capture an objective, I have lost 2 platoons but started with 10 so the game is scored a 5-2 to the Germans. Who'd have thought it?

In retrospect, I think I should have left the Heavy Mortars off in reserve, and deployed another infantry platoon to back up my initial defense. I could then also maybe have thought about attaching out the elements of the Heavy platoon...

I think the best thing I did was shoot up the Yank infantry with the panzers, as without that, they would have been across the river with nothing I could do about it, and as it lucked out, the panzers stayed alive too...

To Brett's credit he kept pushing the situation, even if he only realised how the barbed wire was going to inhibit his troops, after he had deployed and started moving towards it! And quite frankly I felt he was still going to force the situation with his main thrust, but I was pleasantly surprised how my thin line managed to hold out... I just didn't die enough to leave a gap Brett could exploit... My Pioneers were golden, remembering to bring their barbed wire to the party! Definitely a man of the match award ;-)

I think the mantra now is, never leave home without some pioneers!

So this puts Brett back into Luxembourg. No territory lost but none gained either. I won the roll off for initiative for the next game and thus become the attacker. The campaign special rules force me to continue attacking with the Panzer Firestorm troops I have, currently in B3 (Mairy). Do I attack Luxembourg to reclaim it and stabilise the line? Or do I attack B2 (Belgium) to cut off Luxembourg, forcing Brett to suffer Out of Supply conditions in Luxembourg, hopefully making it easier for me to attack at a later time? Or do I try and capture B2 (Verdun) and the 80 campaign victory points it would give me for the city and the bonus 100 campaign points for doing the same? But of course this then produces a thrust to which its flanks could be vulnerable... decisions, decisions!

The only thing we still have to do is work out whether any Firestorm troops were captured after the game...

Stay tuned for more drama...


Thursday, 2 May 2013

Firestorm Lorraine - Turn one, Game two - Hold the Line

A couple of weeks back, Brett and I decided to make more of our series of one off games, now that we both have a degree of competence with the rules and general tactics of the game, so some kind of campaign of linked games seemed in order.

 Some time ago Brett picked up the Blood, Guts and Glory book, for his American Forces, and was quite thrilled with the prospect of Tank battles in NW Europe.

I must confess at the time this came out, and I checked out the German lists, suddenly finding my Wehrmacht was getting reduced to Reluctant Trained as the Yanks improved to Confident Vets, did not fill me with much enthusiasm...

However, having found a free online download of a smaller scale Firestorm setting entitled Lorraine from the BF website, it seemed too good to pass up the chance to learn the Firestorm campaign setting. We also have the Firestorm Market Garden and Bagration sets but haven't figured out how to use them yet, so this seemed the perfect way to learn...

The first game we played saw, Brett start the campaign, attacking my forces in Luxemburg (A3) from Mairy (B3). I chose a themed Panzerkompanie from BGG, which Brett had to attack with his Armoured Rifles, and we rolled up Counter-Attack. Brett had a bunch of big AT guns as his Firestorm troops for the mission which he put down on a ridge overlooking my position, which kept me pinned down behind it. We cocked up a bit giving the guns the benefit of being in cover for being dug in, not realizing they were too big to get this cover bonus... I managed to keep my force fairly intact, knocking out a couple of these guns with moving and storm troopering back out of harms way... but Brett advance across a broad front, and manage to get his 'teleporting' M10 tank destroyers behind me by about turn 4 or 5 and in one round of coordinated activity wrecked my force which being reluctant failed a bunch of morale rolls and quit the field giving Brett a 6-1 win and Luxemburg!

Thankfully Brett failed his campaign roll to destroy my Firestorm tanks (3 x PzIV/70s). We then rolled of for initiative for the next battle, which I won making me the attacker in the next game.

So on with game two of Turn One...

As the German player I am only allowed to attack from a location that has Firestorm Panzer troops. This limits my options some what, but allowed me the chance to counter attack round Luxemburg, rather than going for it directly, with the chance of cutting it off, so that's what I chose to do...attacking from A4 to B3 Mairy

I stuck with the same Panzerkompanie from BGG, which in the first Turn sequence of the game gives you 1250pts.

I took:
HQ - 2 x Panther G
3 x Panther G
4 x PzIV J
3 x StuG G
1 x GPG 'scout platoon'; 7 x P'faust/MG teams and 5 x 251/1D half tracks

Added to this force I had the Firestorm Panzers; 3 x PzIV/70's (proxied in game by jagdpanzers).

Brett took (IIRC):
HQ - 2 x Sherman 76's
2 x Shermans + 2 x Sherman 76's
3 x Shermans + 1 x Sherman 105
Tank Destroyer 'teleporters'; Security section plus 2 x M10's

Added to his force he had a Firestorm Infantry Platoon of 10 teams plus 1 x bazooka


 I set the terrain up before the game, representing (hopefully) the French countryside of the Lorraine area...

And we rolled up a mission; Hold the Line.

As soon as this happened, I felt doomed - I have played this recently against Paul in our Breville campaign and know only too well, whilst the defender suffers delayed reserves, he benefits from 2 ambushes. So Bretts 4 platoon tank force would mean, 2 platoons off and 2 platoons on, both ambushing! Sure enough that's what Brett did, having chosen the end to defend, and us placing objectives.

Brett predictably placed one objective centre rear of his position and I placed mine as near as possible in the open to my right hoping my tanks could get a quick clear run at it.

So the only troops on the table for Brett were his HQ tanks, one each tucked behind the left and right flank woods in below pic.

I had opted for a rush down the road with my half tracks, knowing full well they would get hammered, but this would sacrificially reveal Bretts ambush, hopefully allowing my following tanks something to do about it. I thought about AtTheDoubling the half tracks straight onto the objective, but it would only have made their demises all the more easy and even if they survived they wouldnt be able to contest the objective for a further turn.

The half tracks would be supported by the majority of the tank force.
I did however decide to send the StuGs on a long run round the left flank, thus threatening the rear of Bretts CO tank, and a threat on the rear objective. I also chose in the end to ATD them (this would be a tempting target to attract Bretts other ambush, and be as far from the front objective as possible...)

So, my deployment as below, Bretts tanks virtually hidden from view behind the woods...


...and view again from the other end...


Then I remembered to deploy my HQ Panthers behind the main central thrust following the half tracks...

The FHH Panzerkompanie, is horribly one dimensional - all armour - no real recce to mitigate ambushes. The GPGs are 'scouts' in name only... Nor do I get any artillery which could offer me the concealment of smoke,... its just lots of guns, that are easy to hit, and once hit and taking damage will quickly quit the field due to their poor morale rating. The only thing to keep me in it, is the high front armour of the Panthers and PzIV/70s...


So off we went 'to the races', with the GPG roaring off down the road, singing 'Gott mit uns' as he was going to have to be! The panzers followed up behind, trying to get positions to fire back at the likely place Brett would pop his ambush...


... with the StuGs heading off down the other flank, trying to draw more attention... I have no targets in the first turn, and stormtrooper at little closer with half tracks and PzIVs...


Bretts tankers cant believe their luck, seeing a trio of StuGs advancing having thrown caution to the wind... Brett lines up 3 tanks with 12 shots at the ATDing StuGs..., with the 105 looking at the half tracks the other way...


In the centre wood, 4 more Shermans train their barrels on the 'do or die' armoured infantry... and can also see the leading PzIVs coming round the farm house...


The Shermans let rip destroying all five half tracks, but 4 of the 7 teams inside survive, leaping from the flaming wrecks ... luckily meaning they are not required to take a platoon moral check...


Two of the PzIVs are also hit multiple times, but are only bailed, but sadly taking multiple bail results each, are forced to take morale checks and being reluctant promptly quit the field leaving yellow 'coward' markers to show their last known positions... However the remaining tanks do not require a morale check, the platoon being at 50% strength...


The StuGs receive the incoming 12 shots hitting on 3s, yet amazingly only suffer one destroyed and one bailed! Which doesn't amount to a morale check...


I have survived the ambush, and amazingly have a chance to continue! Really I should have been blown away in turn one, game over with three platoons out of 5 gone and a pathetic chance of needing a 5 to stay on the table... But sometimes thems the breaks, so press on ...

German turn 2, the bailed StuG remounts! And the two press on to threaten the rear of the COs Sherman...


The five Panthers look for payback against the central Sherman platoon; 10 shots needing 6's, can I get lucky?...


While the remaining 2 PzIVz's and '70's go after the Sherman 2iC...


The Panthers score 3 hits, destroying 2 Shermans and bailing a third... the platoon promptly rolls a 1 for platoon morale and quits the field, evidenced by the fleeing tank crew down the road...


The StuGs score two hits on the Sherman CO, who promptly decides to join the adjacent Sherman platoon and allocates hits there, which destroy 2 Shermans...


But the Sherman 2iC survives, all shots missing, curses! But still, that's really made it game on for the Germans!


Now Brett has some work to do! The 2iC returns fire at the remaining PzIVs destroying one and bailing the second, who fails morale and quits the field...


On the flank, Brett manages to get a Sherman out of the woods and onto the flank of the StuGs and the CO joins in the shooting... Darn stabilizers on the moving Sherman still gives him 2 shots, added to the 2 from the CO spell the end of the StuGs. Still they achieved more than I expected... and tied up a platoon on the wrong side of the board for a couple of turns...


Back to the Germans, the Panthers move up through the cornfield to try and take out the Sherman CO... The German infantry have still failed to motivate but dig in and stay gone to ground...


The 70's get into position to kill the Sherman 2iC tank...


This time up he goes in flames, and we're sitting on the objective, with nothing in range to get anywhere near to contest. The 70s fail their stormtrooper move so are left with their arse's literally hanging out, but I cant do much about that and there's little that can affect them...


The Sherman CO is only bailed... who scampers from his tank...


Bretts turn three and he rolls one dice for reserves needing a 5 and wouldn't he darn well get some! Up come the 2 M10s from the tank destroyer platoon. No stabilizers, gives them 2 shots at range and cover for slope of the hill at the rear of the 70's, needing 5's... Brett rolls 'box cars' followed by two successful FP tests and 2 of the 70's brew up! I need a 5 for platoon morale to stay in it, and get a 5!


The Shermans who had moved over from the other flank cant hurt the front armour of the panthers and miss the remaining 70.

In the Germans return turn, the Panthers in the cornfield knock out the 105 Sherman, and the 70 moves to the cover of the burning wrecked 70's, which also gets him contesting the objective, and aims at the M10s, as do the 2 HQ panthers.


The cornfield panthers destroy the Sherman 105...


Whilst one of the M10s is knocked out...


Bretts turn 4 sees his last reserve arrive, in the nick of time? The infantry Truscott trot desperately toward the German front objective but are still too far from it...


Brett has to break me this turn with his shooting or its all over... the M10 returns fire at the 70 but fails to destroy it, one shot hitting but bouncing off its front armour...


Brett moves the remaining Shermans from the flank to have a shot at the flank of the panthers. I had been unable to pass stormtrooper with them last turn to avoid such a possibility, but thankfully only bail one of the panthers in the cornfield!


And that is it, Brett has failed to break my force, and I start the next turn sitting on the front objective, claiming a 4-3 win! Who'd have thought it!? Games of dice eh?!


So that means I capture Mairy, and am one sector away from cutting off Luxemburg.

We both rolled to see if we destroyed the others Firestorm troops, needing 6s and both failed so our forces are still intact.

We also rolled to see who would get initiative for the next battle, with Brett winning the dice roll, so he will attack somewhere next game...

More next time, we hope to have Game 3 of Turn 1, next Thursday...